
Member Post Management (MPM) Module

Document History
Version | Author | Reviewer/Approver | Date of Issue | Page / Section | Brief Description |
|---|---|---|---|---|---|
1.0 | Deema Z. | Asma L. | 14 May 2024 | MPM | Reviewed |
1. Member Post Management
This feature is designed to manage your Suppliers, allowing you to add new suppliers, edit existing ones, delete suppliers, and view their details.
1.1 View Member Post
The user can view their defined suppliers in the system by navigating to the ‘Member Post Management’ screen in the MPM Module from the left navigation panel as follows:
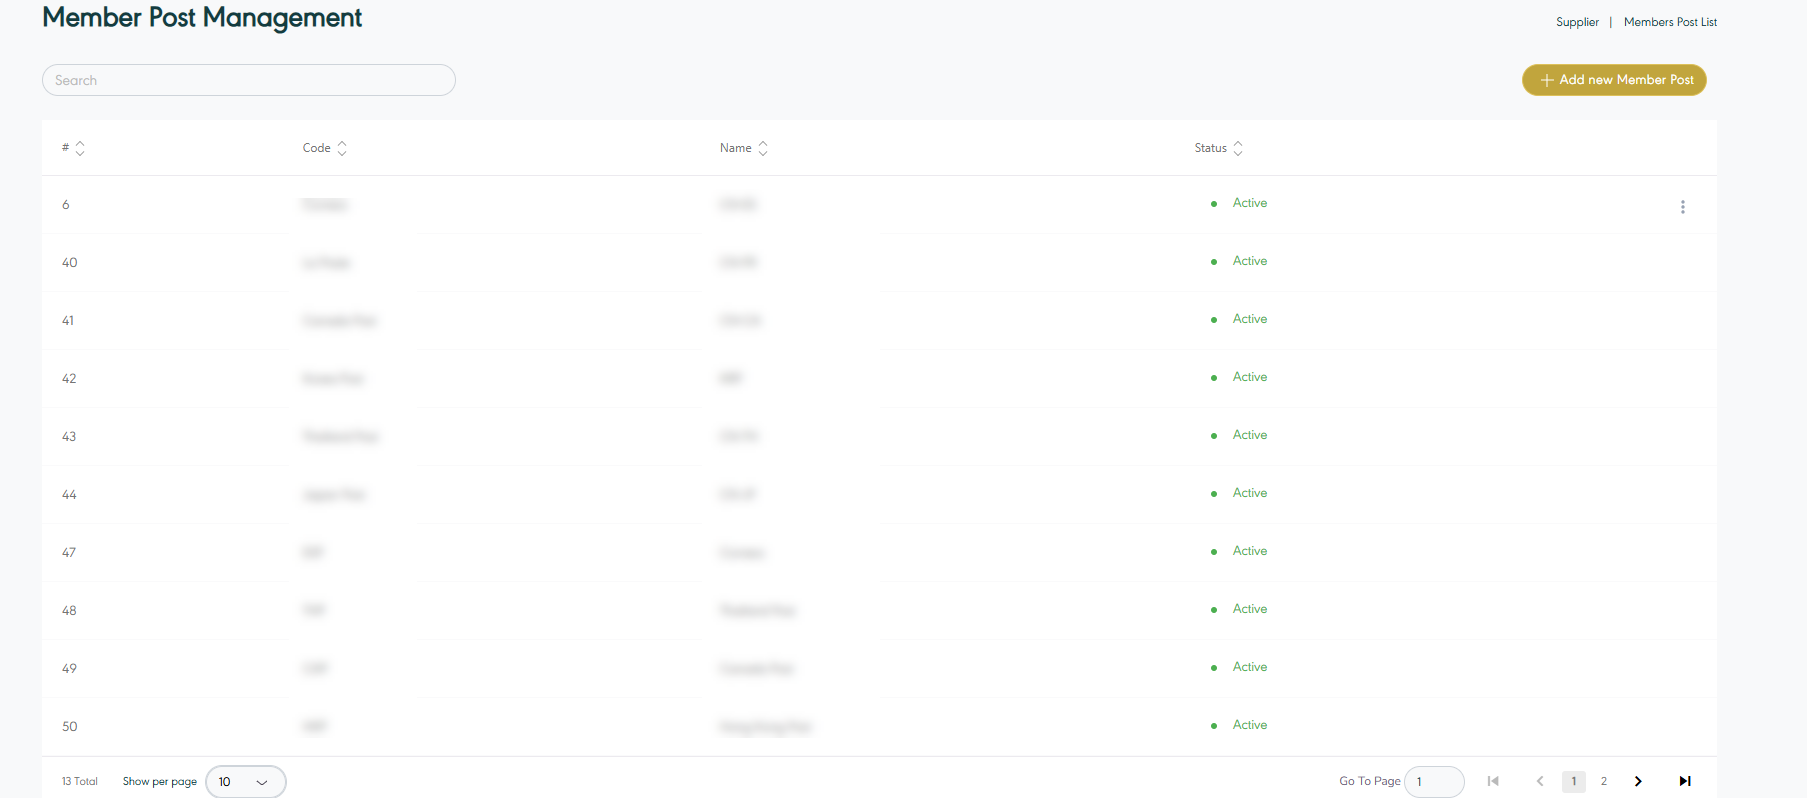
Figure 1- Member Post Management
Add New Member Post : the user can add suppliers by clicking on ‘Add new Member Post’, referring to Add New Member Post section.
Search: the user can search for the members by using the search field.
Show per page: the user can select the number of items to show on each page.
Actions: by clicking on Actions showing when hovering over a supplier, the user can view specific supplier details through the View Supplier Details section, edit the supplier by referring to the Edit Supplier section, edit supplier shipping cost referring to Supplier Shipping Cost, add transit time setting referring to Transit Time Setting or delete as shown below:
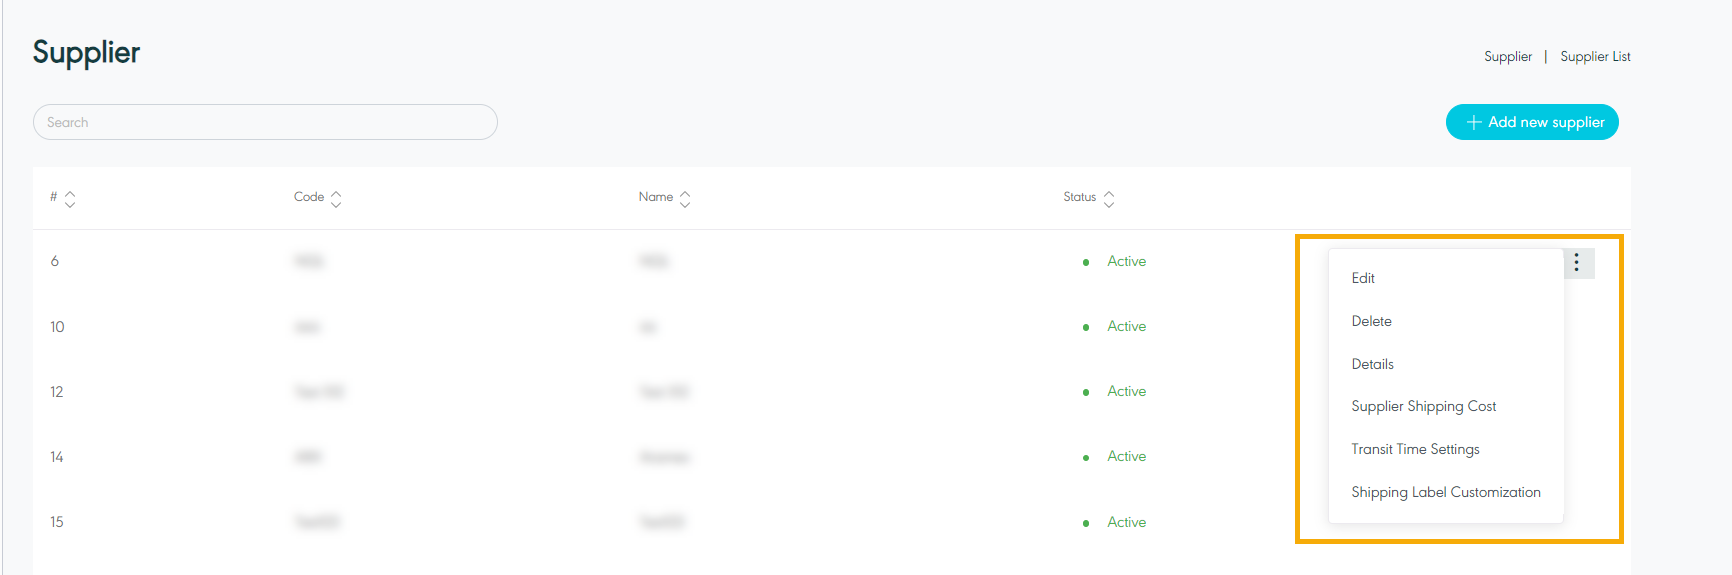
Figure 2- Actions Related Supplier
1.2 View Supplier Details
The user can view details of an existing Supplier by navigating to ‘Supplier Management’ Screen via SRM Module and click on Details from Actions as follows:
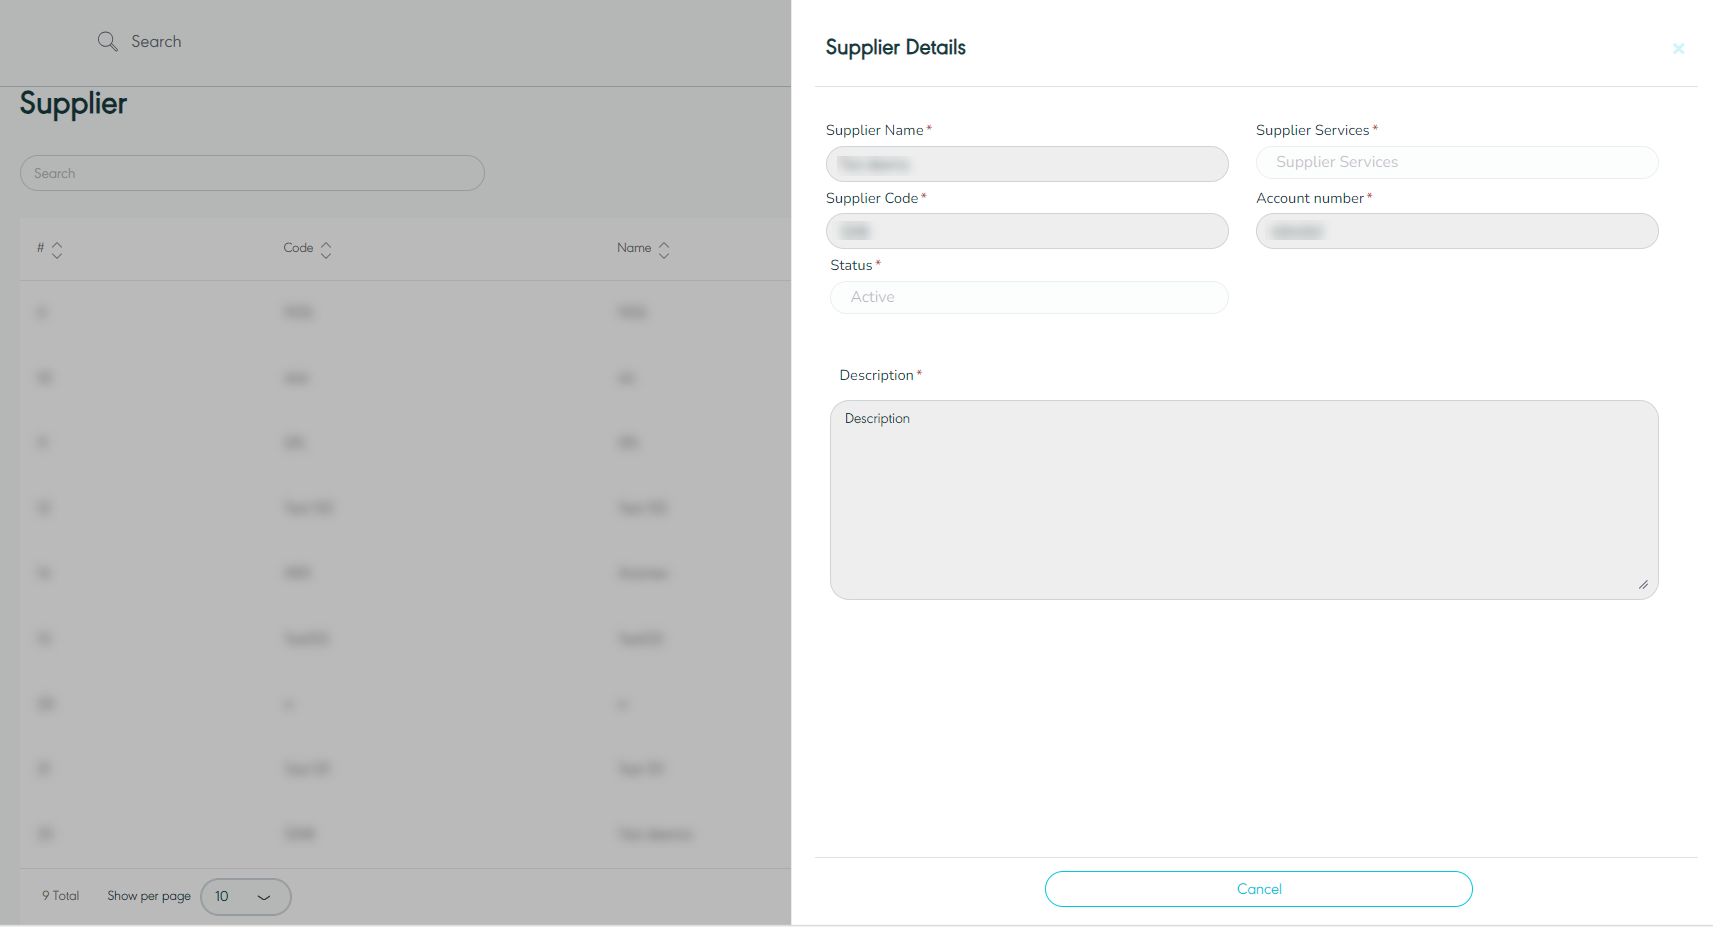
Figure 3- View Suppliers Details
1.3 Add new Supplier
The user can add a new supplier by navigating to the ‘Supplier Management’ screen via SRM Module and clicking on Add new Supplier then filling in the information in the below outlined sections:
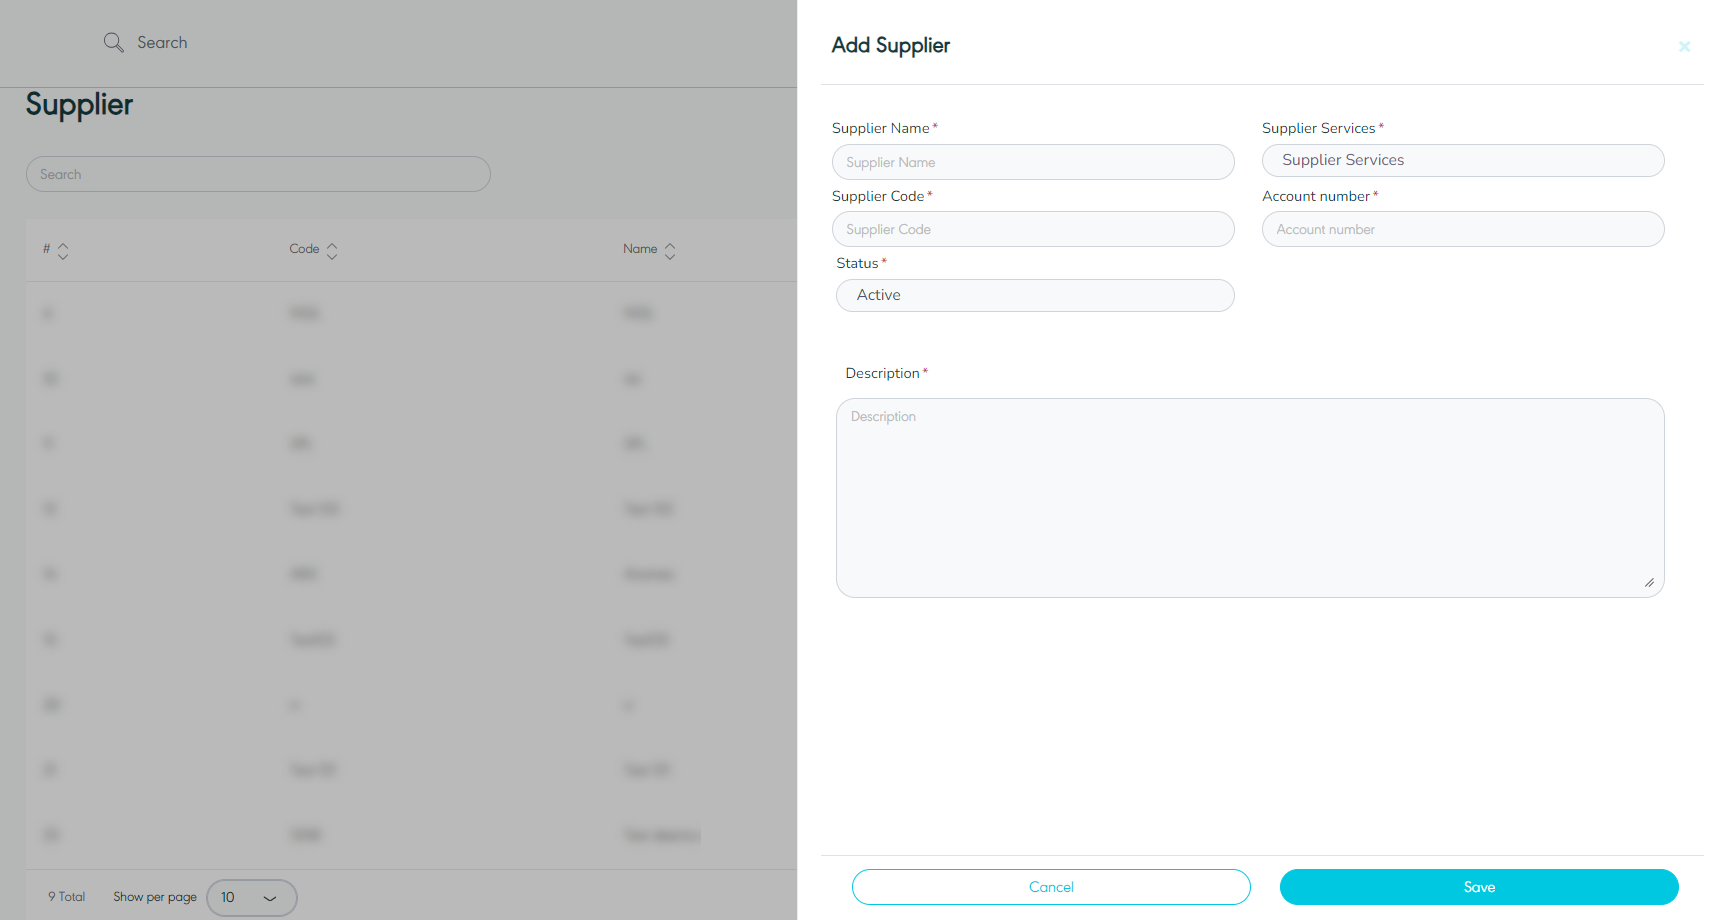
Figure 4- Add New Supplier
Supplier Name: this field represents the supplier's name.
Supplier Service: this field represents the supplier's service.
Supplier Code: this field represents the supplier's code.
Account Number: this field represents the supplier’s account number for integration purposes.
Status: this field represents the status where active means that the supplier is currently functioning with GN TEQ and inactive means that the supplier is no longer with GN TEQ
Description: this field represents the supplier’s description.
By clicking on Save, the system adds a new supplier successfully.
1.4 Edit Supplier
The user can edit the details of an existing supplier by navigating to the ‘Supplier Management’ screen via clicking on Edit from Actions:
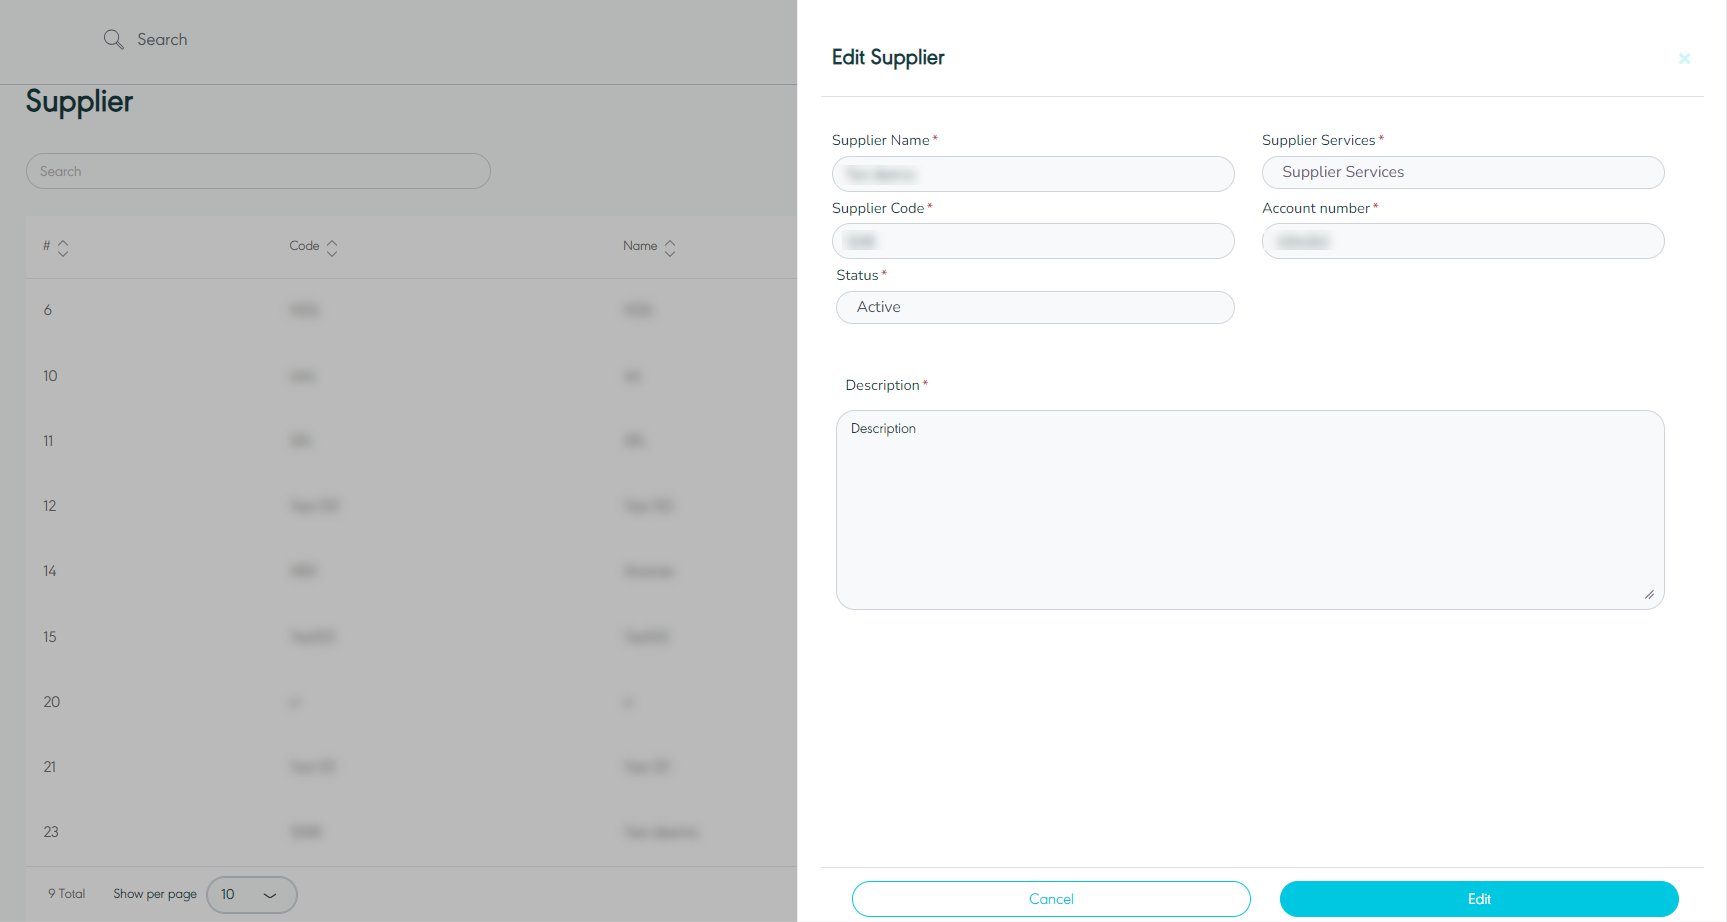
Figure 5- Edit Supplier
By clicking on ‘Save changes’, the system updates the supplier’s information successfully.
1.5 Delete Supplier
The user can delete an existing supplier by navigating to the ‘Supplier Management’ screen via SRM Module and clicking on Actions when hovering over the customer then clicking on ‘Delete’.
1.6 Supplier Shipping Cost
The user can manage the shipping cost the first mile, middle mile, last mile, origin clearance and destination clearance setting by navigating to the ‘Supplier Management’ screen via SRM Module and clicking on Actions when hovering over the supplier then clicking on ‘Supplier Shipping Cost' as follows:
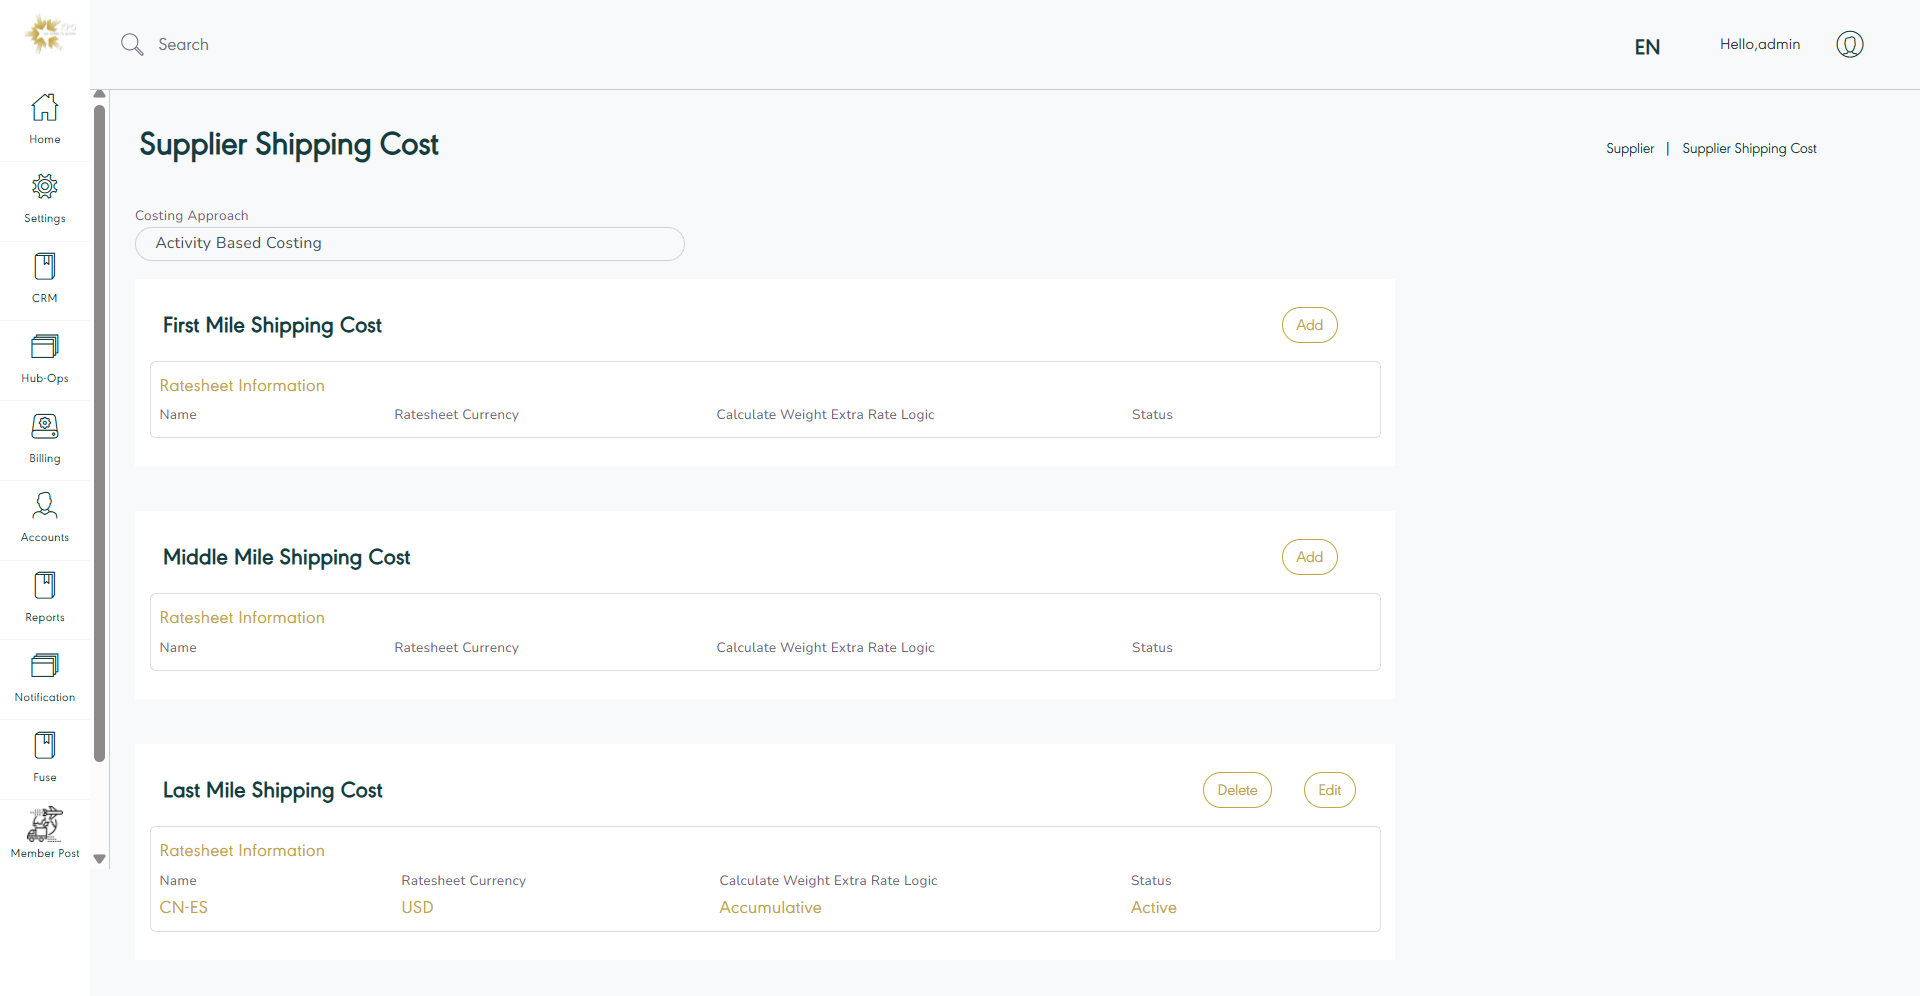
Figure 6- Supplier Shipping Cost
First Mile Shipping Cost
Estimated Cost: the user can calculate the shipping cost based on the chargeable weight of the shipment or flat rate per shipment.
Actual Cost: the user can calculate the shipping cost based on the field by the user.
Variances: differences between estimated cost and actual cost.
Last Mile Shipping Cost
Estimated Cost: the user can calculate the shipping cost based on the chargeable weight of the shipment or flat rate per shipment.
Actual Cost: the user can upload the actual last mile cost which is received from the supplier.
Variances: differences between estimated cost and actual cost.
Note:
All of the above applies to all types : middle mile, origin clearance and destination clearance.
1.6.1 Add First Mile Shipping Cost
The user can add first, middle, last mile shipping cost by clicking on Add button as follows:
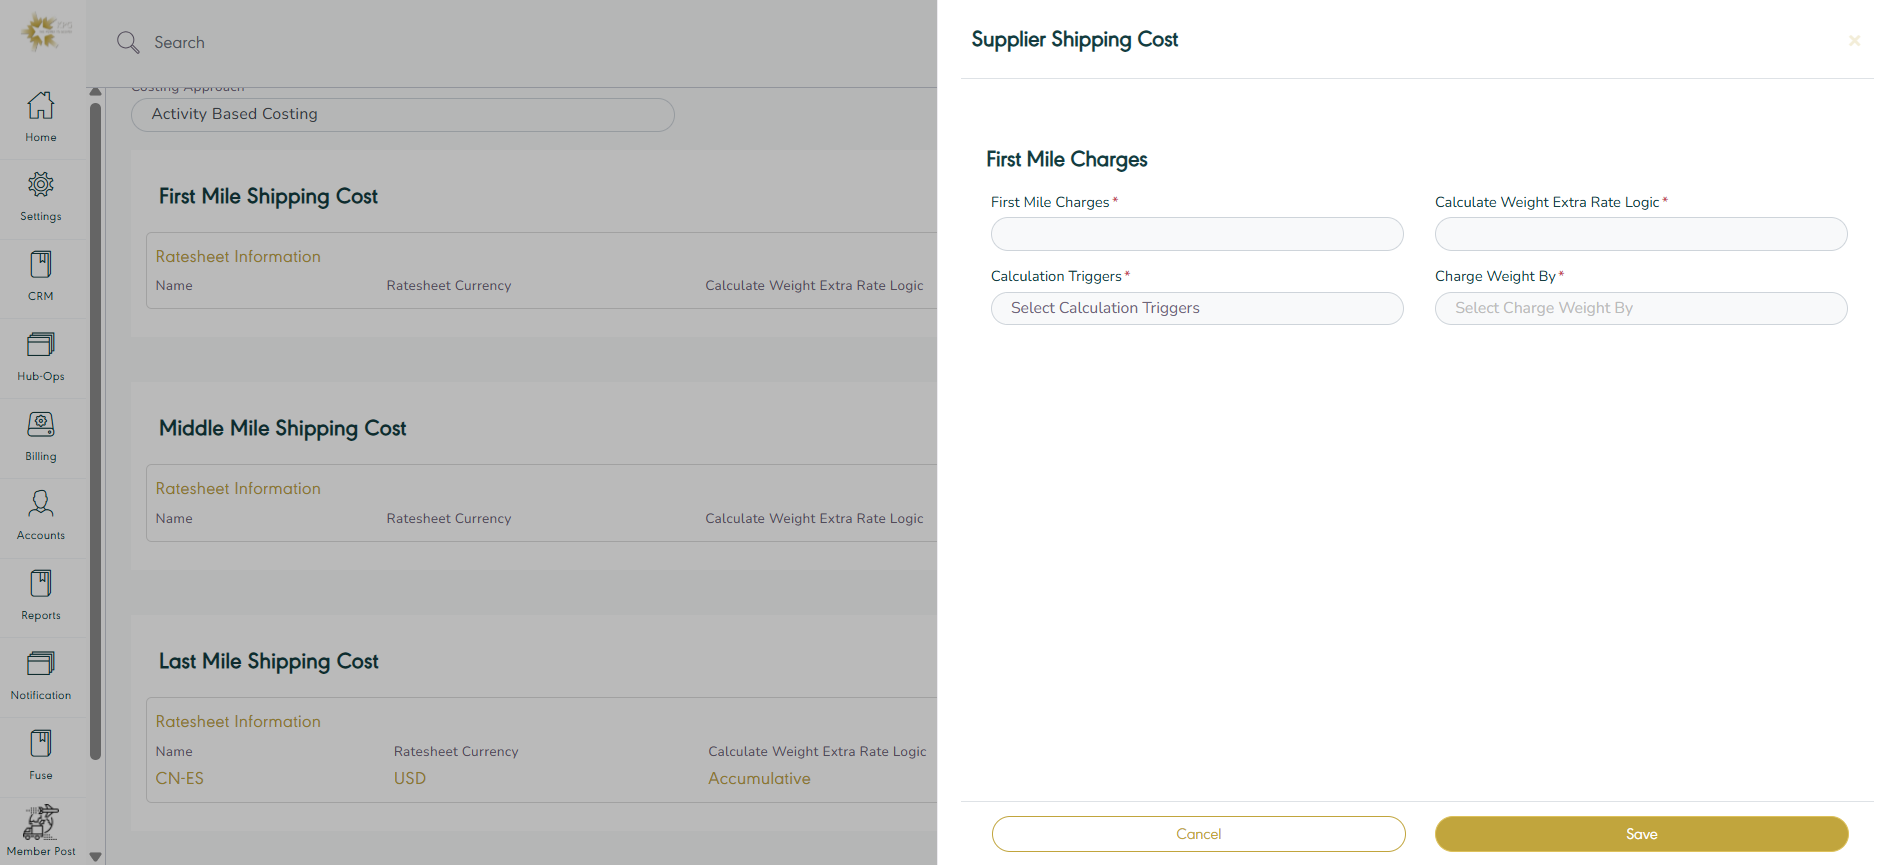
Figure 7- Add Supplier Shipping Cost
First Mile Charges: this field represents the ratesheet name.
Calculate Weight Extra Rate Logic: this field represents the method calculate the rate e.g.: Accumulative or Greatest Weight Break Cover the Extra Weight.
Calculation Triggers: this field represents the shipment events, to calculate the estimated charges for a shipment, a calculation trigger should be added to the shipment.
Charge Weight By: this field represents the method of calculate shipment weight e.g.: Shipment Actual Weight, Shipment Airline Weight, Shipment Last Mile Weight …. etc.
By clicking on Save the system adds first mile charges successfully.
1.7 Transit Time Setting
The user can customize the transit time calculation triggers by navigating to the ‘Supplier Management’ screen via SRM Module and clicking on Actions when hovering over the supplier then clicking on ‘Transit Time Setting' as follows:
Select the calculation triggers for the shipping timeline three legs (Leg 1, Leg 2, Leg 3).
Select the single shipment event from the list.
Select the ending event.
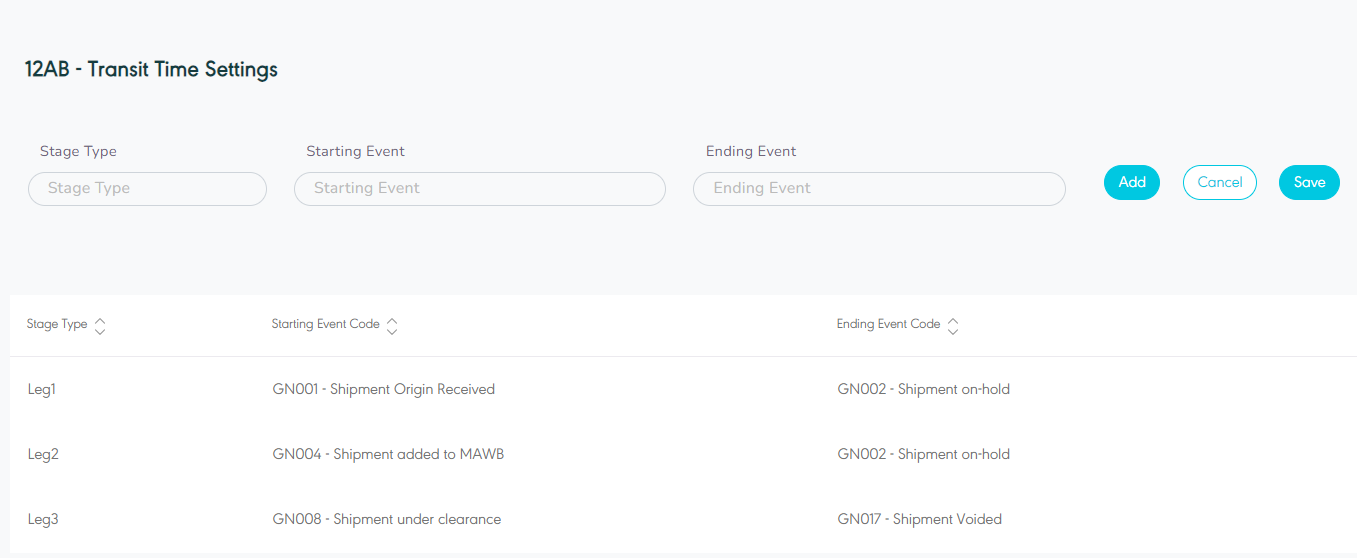
Figure 8- Transit Time Settings
Note:
When calculating the transit time for each of the legs, the system takes into consideration the weekend days in the Origin and Destination countries for the First and Third legs, respectively, as saved in the countries table. Both the business and calendar days should be calculated and saved.
In case of applying the same event more than one time, the system takes the action timestamp of the first event.
1.8 Shipping Label Customization
The user can customize shipping label through enter the label type needed based on the branch code and destination country by navigating to the ‘Supplier Management’ screen via SRM Module and clicking on Actions when hovering over the supplier then clicking on ‘Shipping Label Customization' as follows:
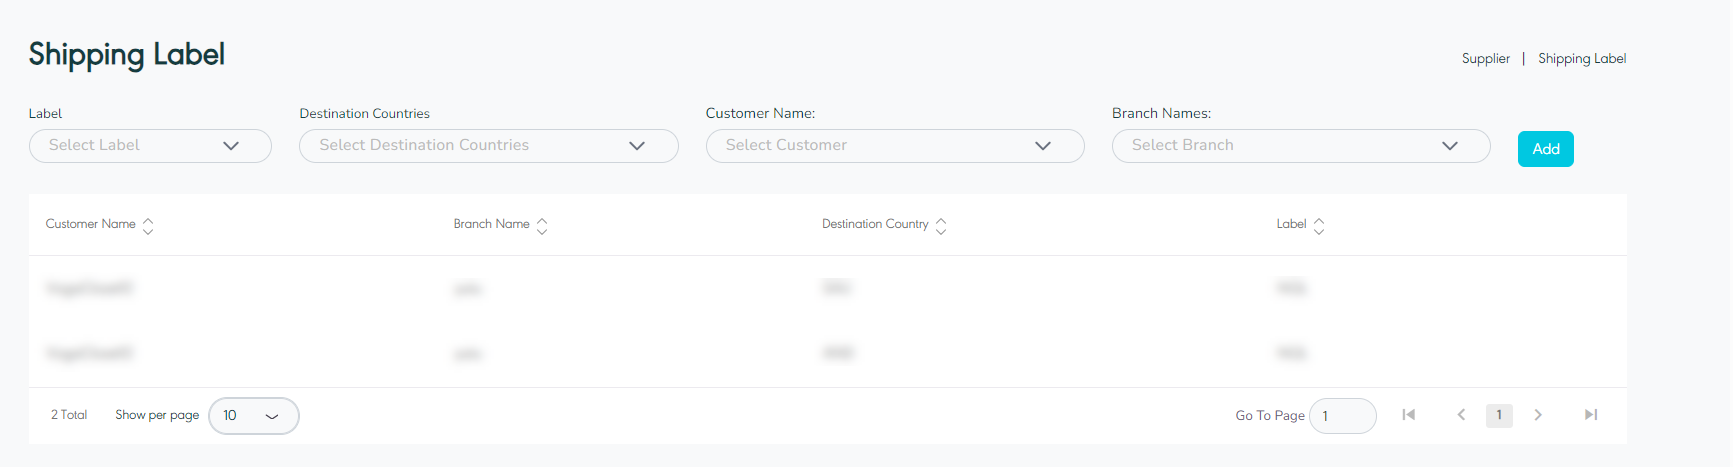
Figure 9- Shipping Label Customization
Note:
In case of not meeting any of the conditions, the system to populate the default label, the selected supplier's label.
2. Supplier Ratesheet
2.1 View Supplier Ratesheet
The user can view their defined supplier ratesheet in the system by navigating to the ‘Suppliers Ratesheet’ screen in the SRM Module from the left navigation panel as follows:
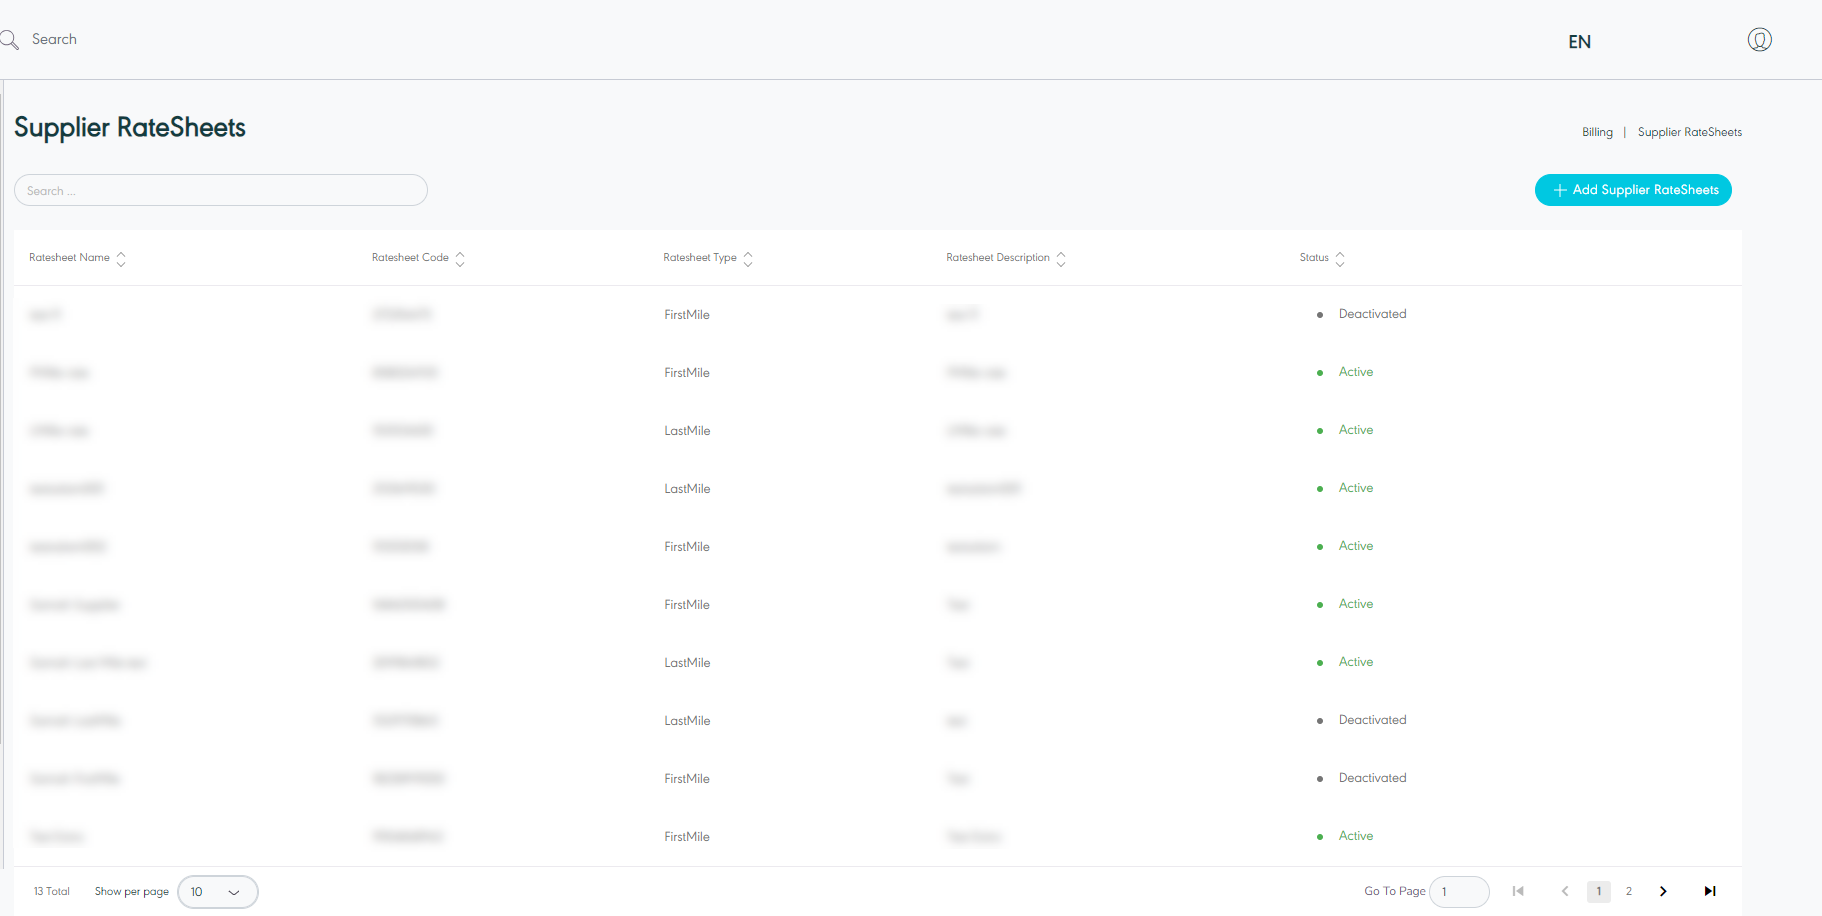
Figure 10- View Supplier Ratesheet
Add Supplier Ratesheet: the user can add new supplier ratesheet by clicking on ‘Add Supplier Ratesheet’, referring to Add Supplier Ratesheet section.
Search: the user can search for the suppliers ratesheet by using the search field.
Show per page: the user can select the number of items to show on each page.
Actions: by clicking on Actions showing when hovering over a supplier ratesheet, the user can view specific supplier ratesheet details through the View Supplier Ratesheet Details section, edit the supplier ratesheet by referring to the Edit Supplier Ratesheet section, test ratesheet by referring to the Test Ratesheet or delete as shown below:
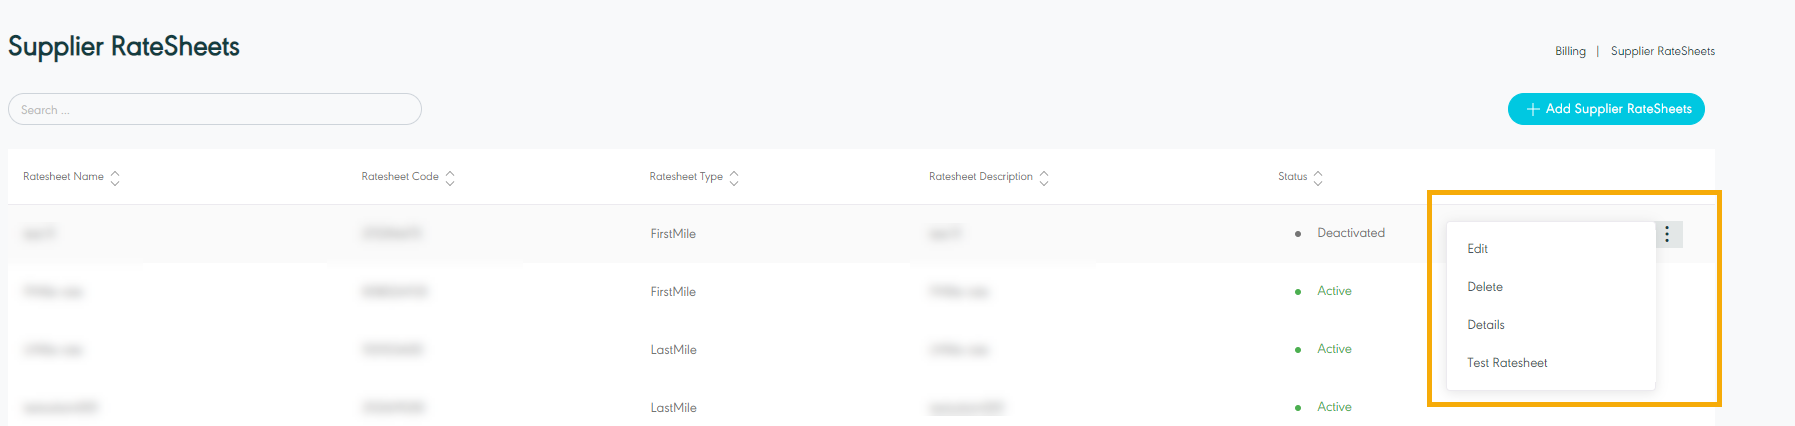
Figure 11- Actions Related Supplier Ratesheet
2.2 View Supplier Ratesheet Details
The user can view details of an existing supplier ratesheet by navigating to ‘Supplier Ratesheet’ Screen via SRM Module and click on Details from Actions as follows:
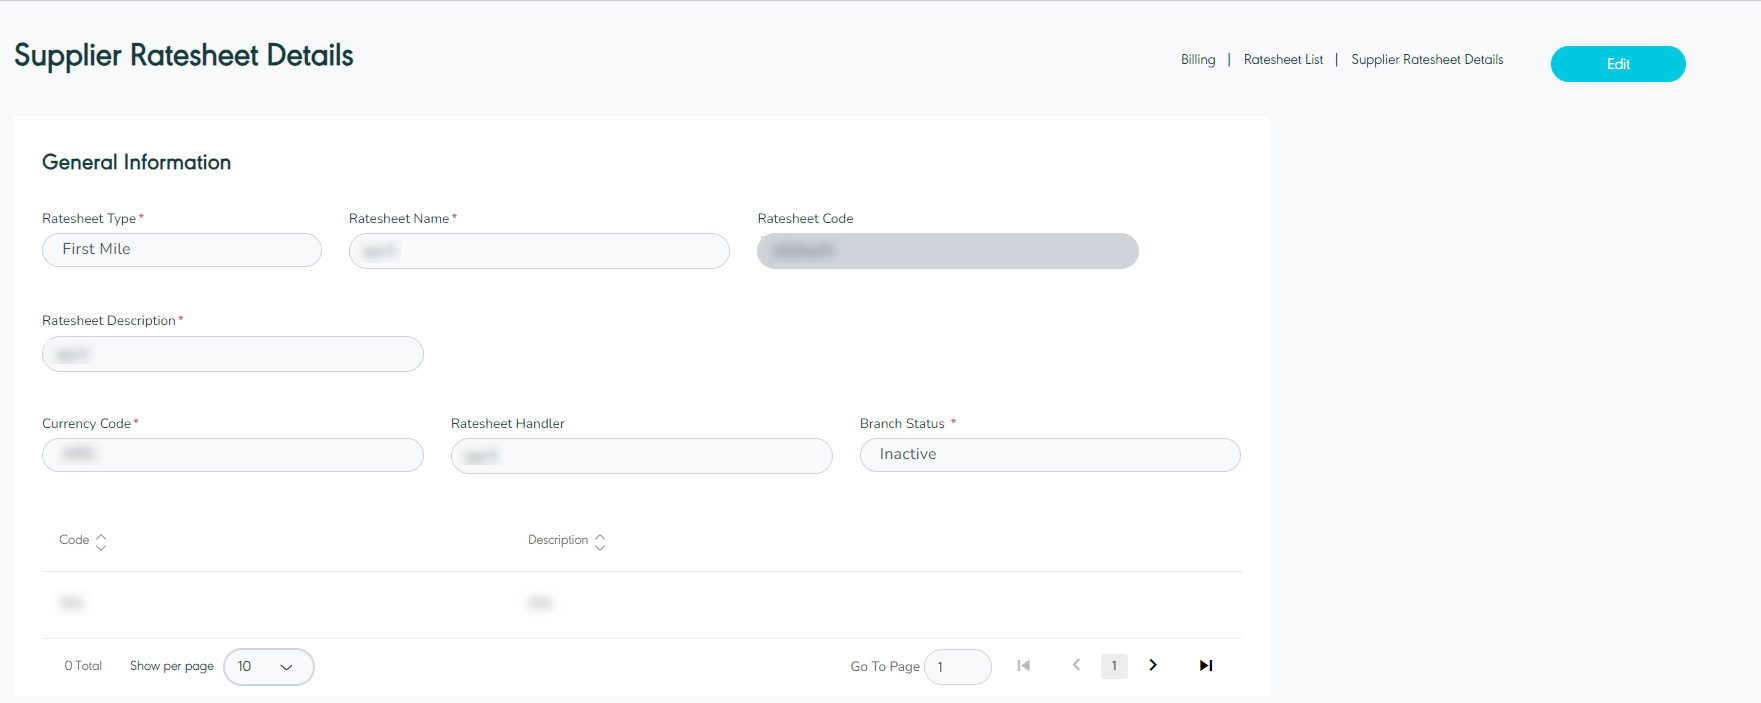
Figure 12- View Supplier Ratesheet Details
2.3 Edit Supplier Ratesheet
The user can edit the details of an existing supplier ratesheet by navigating to the ‘Supplier Ratesheet’ screen via clicking on Edit from Actions:
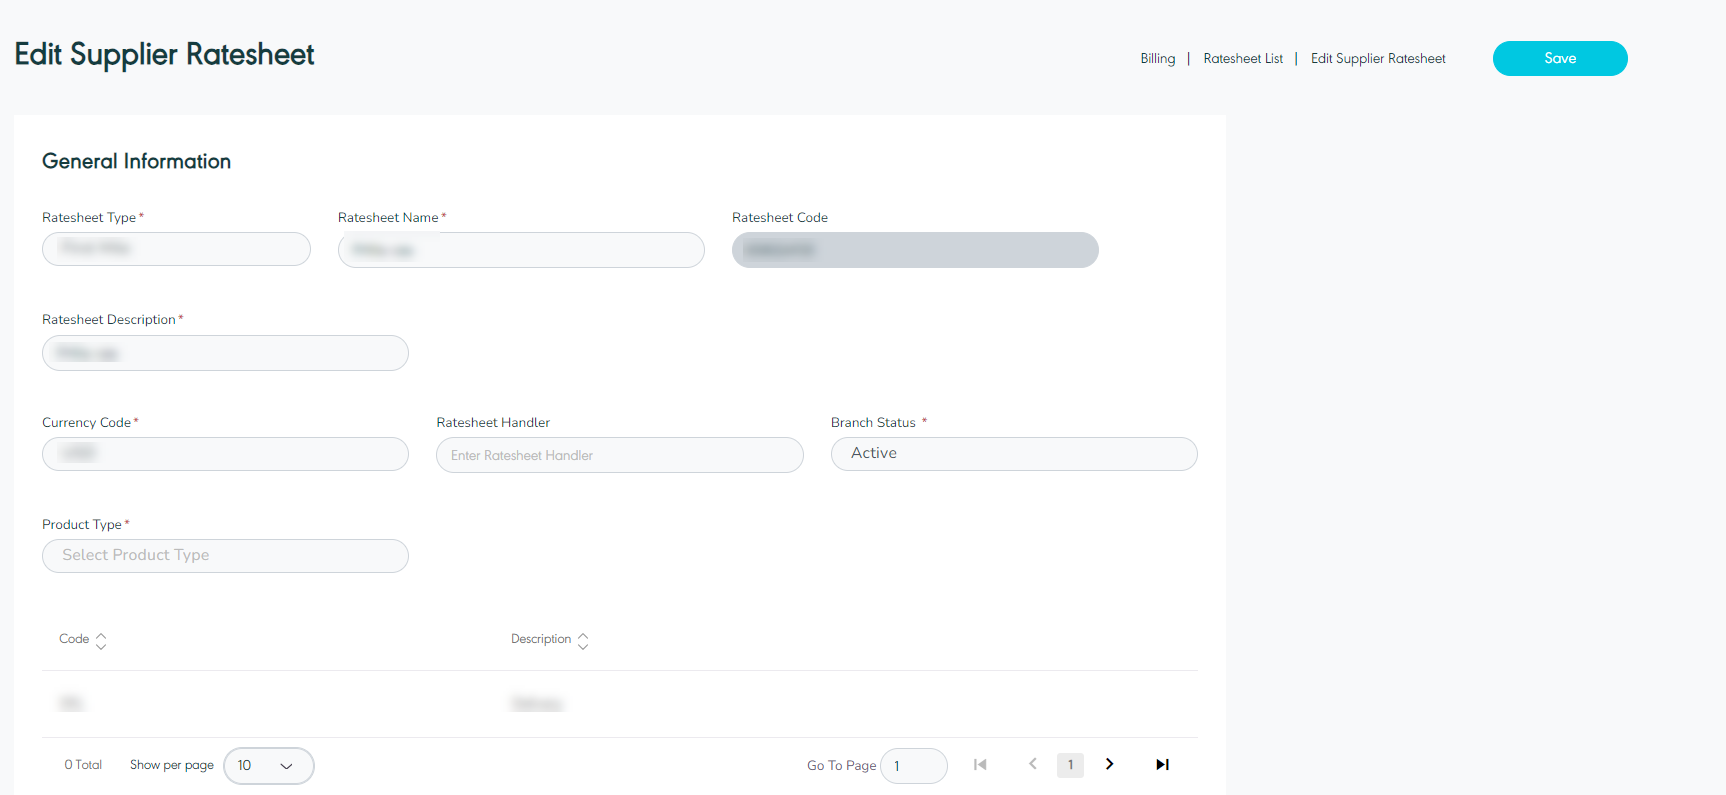
Figure 13- Edit Supplier Ratesheet
2.4 Add Supplier Ratesheet
The user can add a new supplier ratesheet by navigating to the ‘Supplier Ratesheet’ screen via SRM Module and clicking on Add Supplier Ratesheet then filling in the information in the below outlined section.
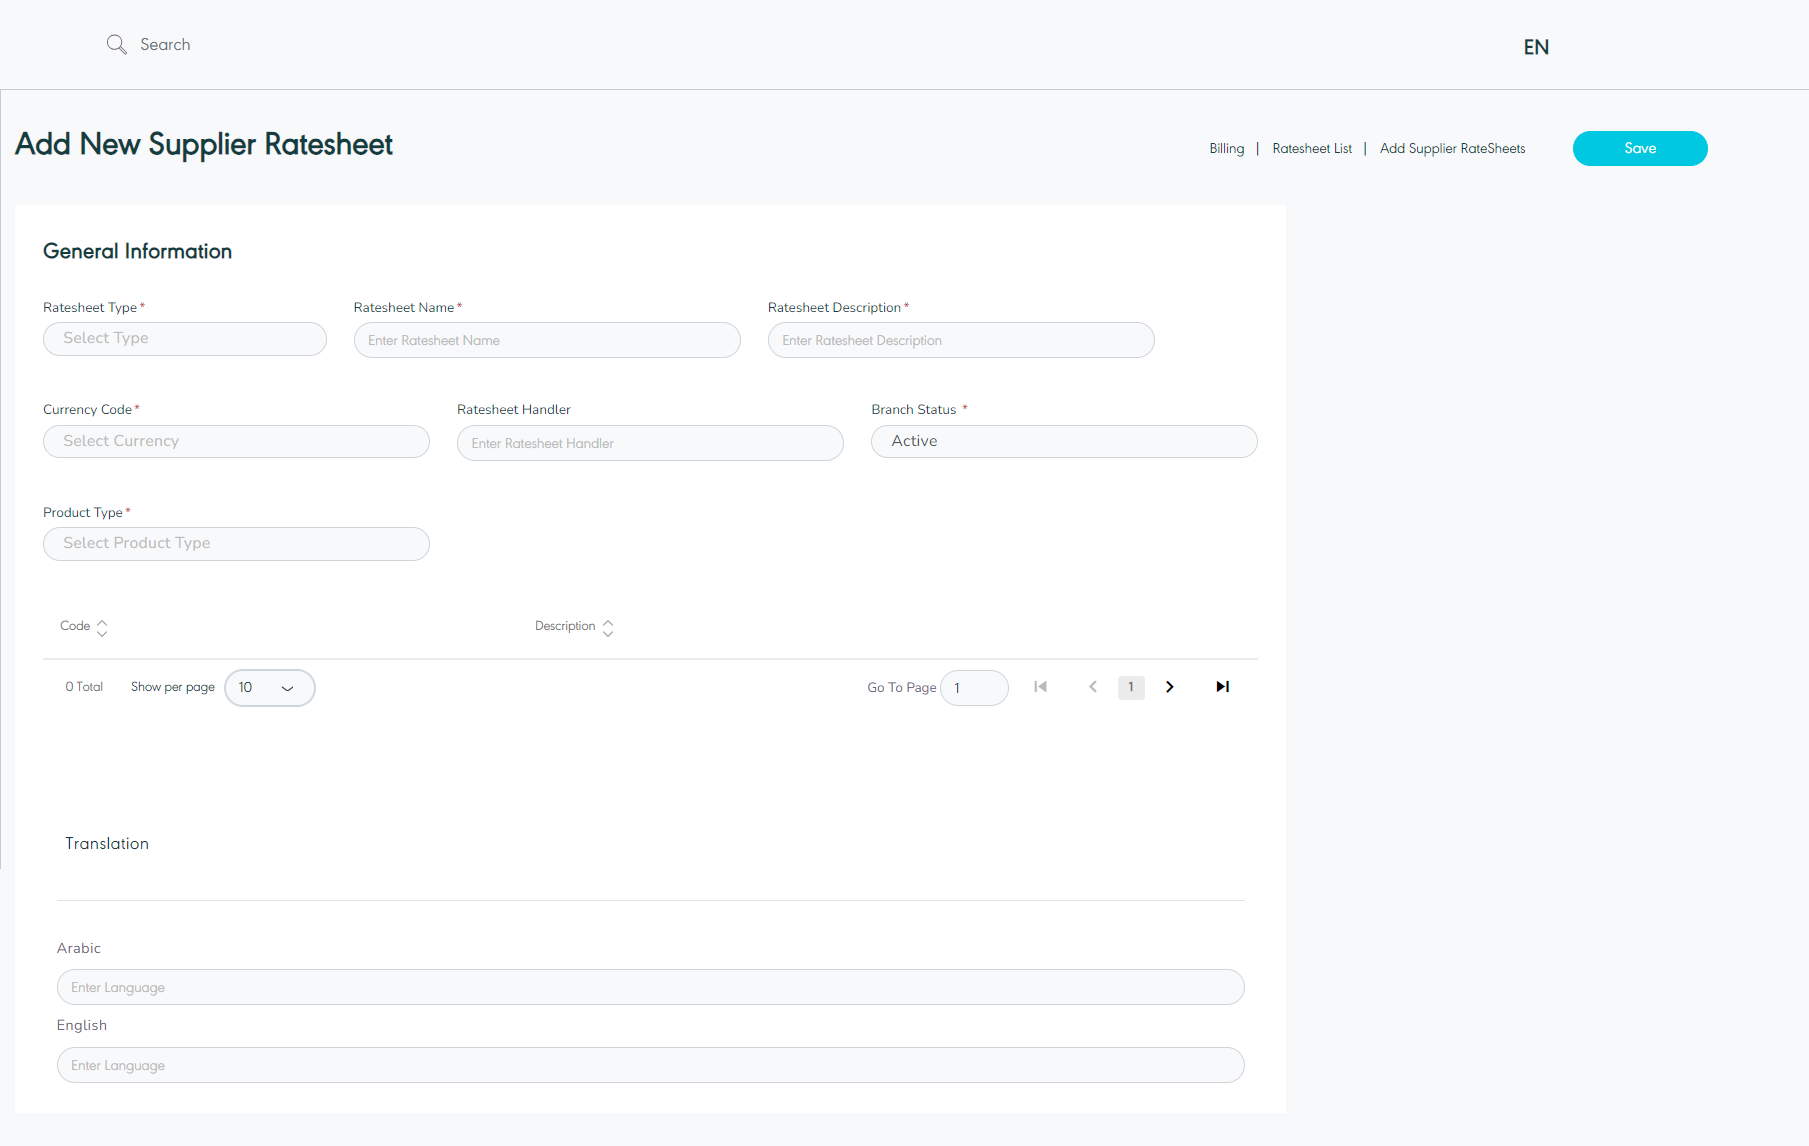
Figure 14- Add New Supplier Ratesheet
Ratesheet Type: this field represents the ratesheet’s type e.g.: first maile, middle mile, last mile, origin clearance and destination clearance .
Ratesheet Name: this field represents ratesheet’s name.
Ratesheet Description: this field represents the ratesheet’s description.
Currency Code: this field represents the ratesheet’s currency.
Branch Status: this field represents the branch status where active means that the branch is currently functioning with GN TEQ and inactive means that the branch is no longer using the GN TEQ system.
Translation: this field represents the translations of the ratesheet.
Product Type: this field represents the ratesheet product service. e.g.: Express, standard …. etc.
By clicking on Save, the system adds a new ratesheet successfully.
The user can add more than the product type and its destination and origin.

Figure 15- Fill the Origin & Destination
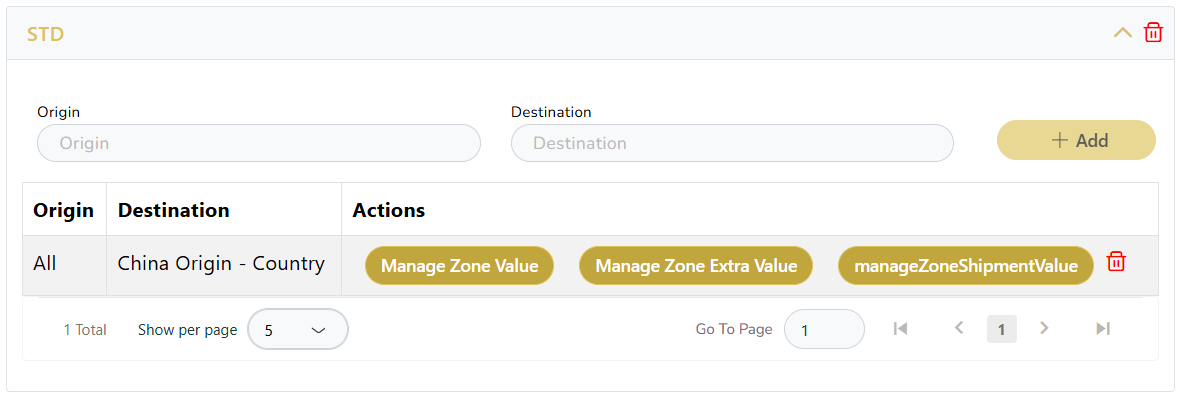
Figure 16- Manage Zones
Supplier Ratesheet Zone Value
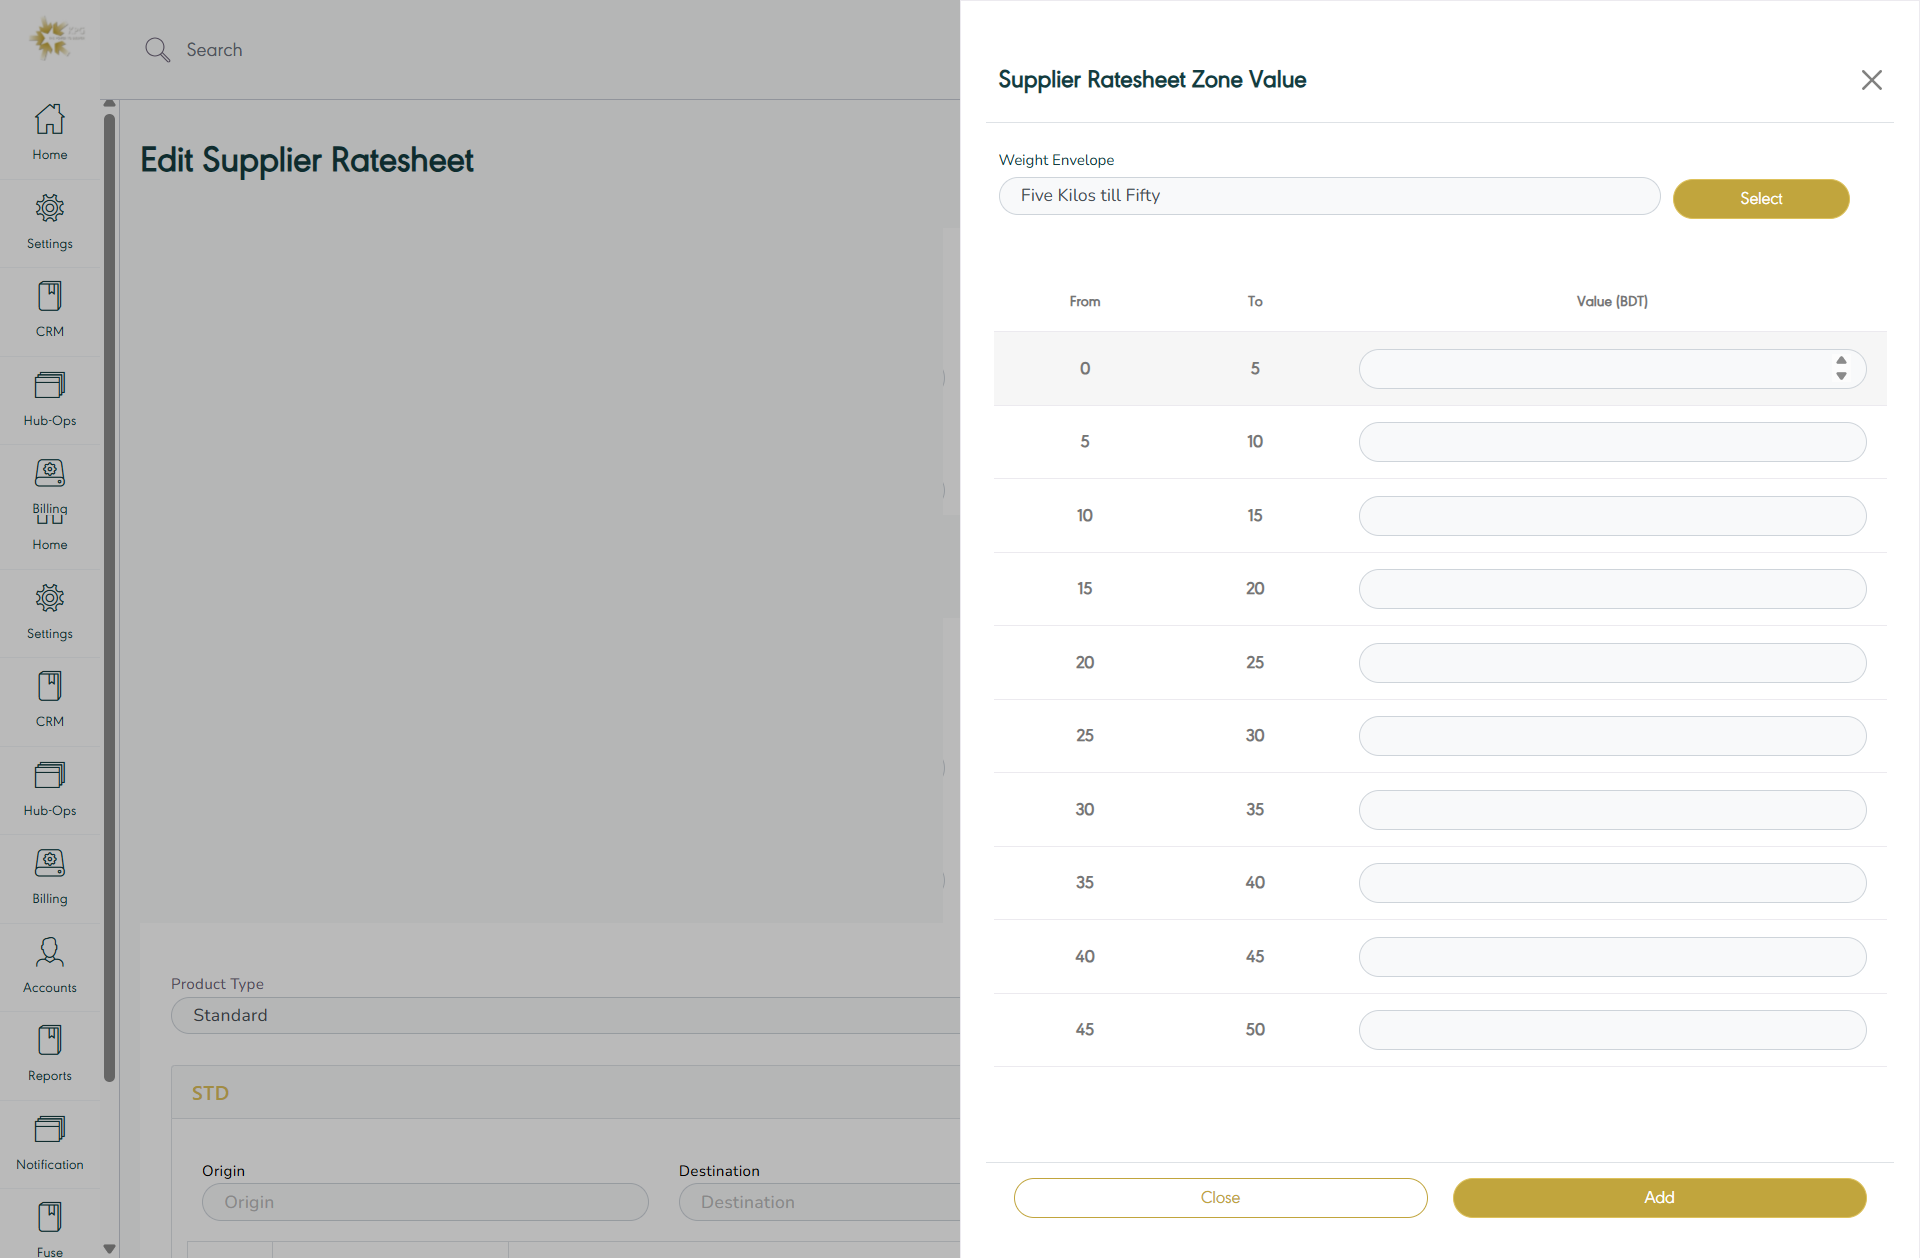
Figure 17- Manage Zone Value
By clicking on Add the system adds zone value to the ratesheet successfully.
Supplier Ratesheet Zone Extra Value
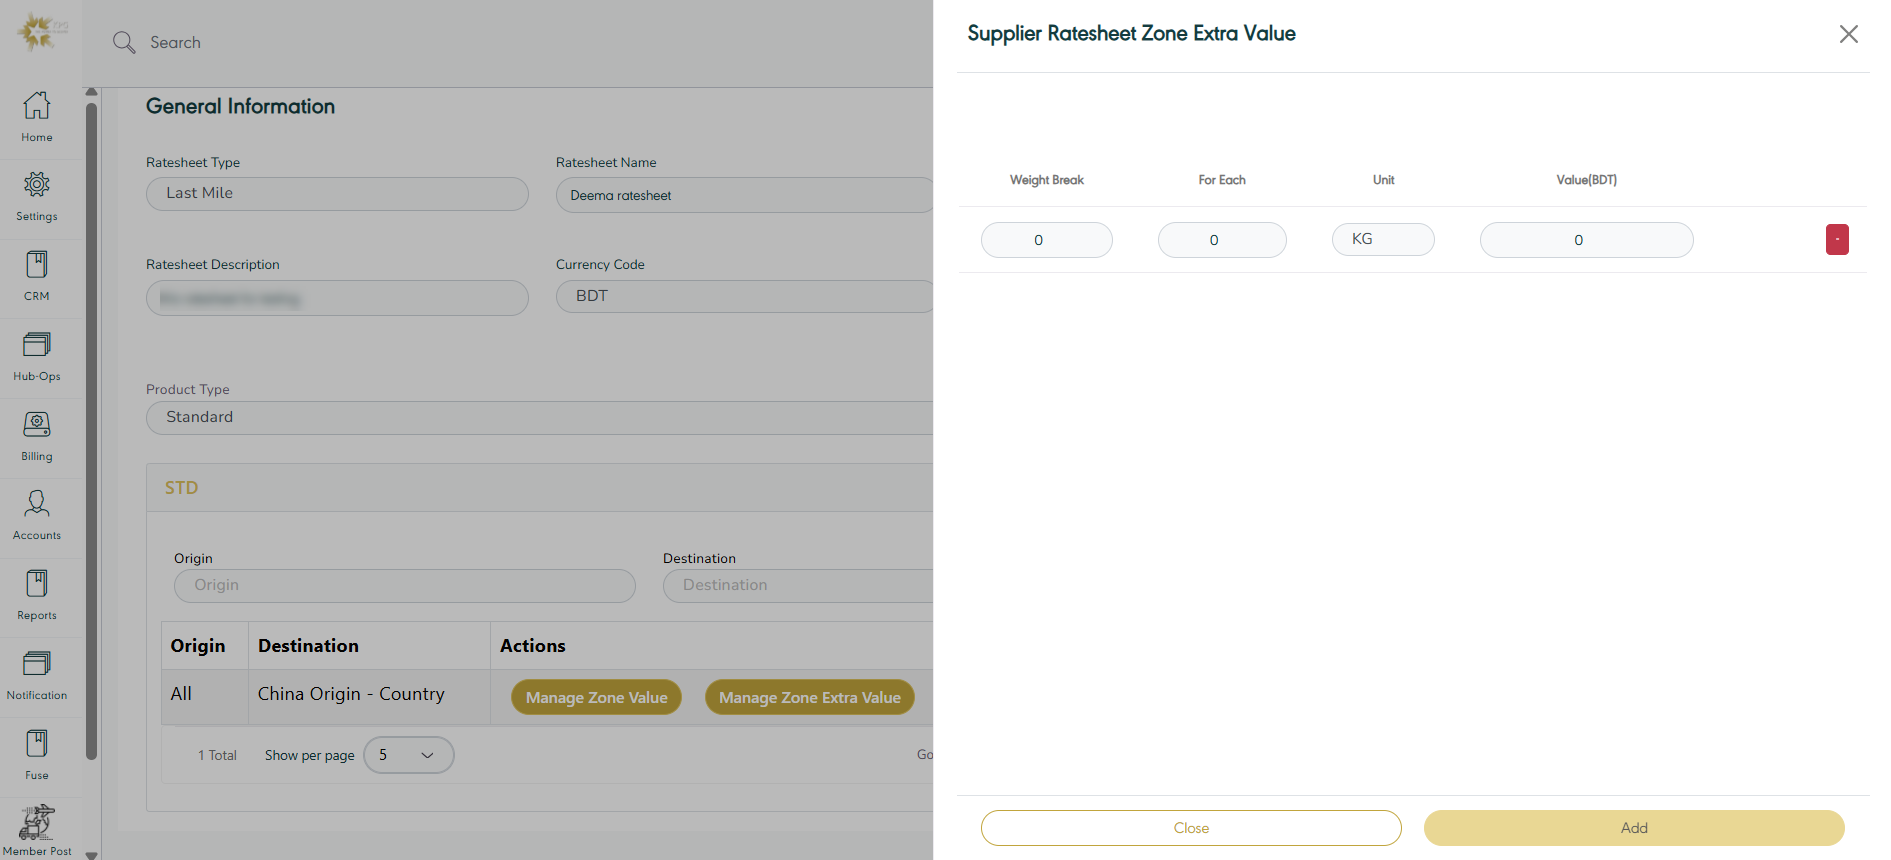
Figure 18- Manage Zone Extra Value
By clicking on Add the system adds zone extra value to the ratesheet successfully.
Supplier Ratesheet Zone Shipment Value
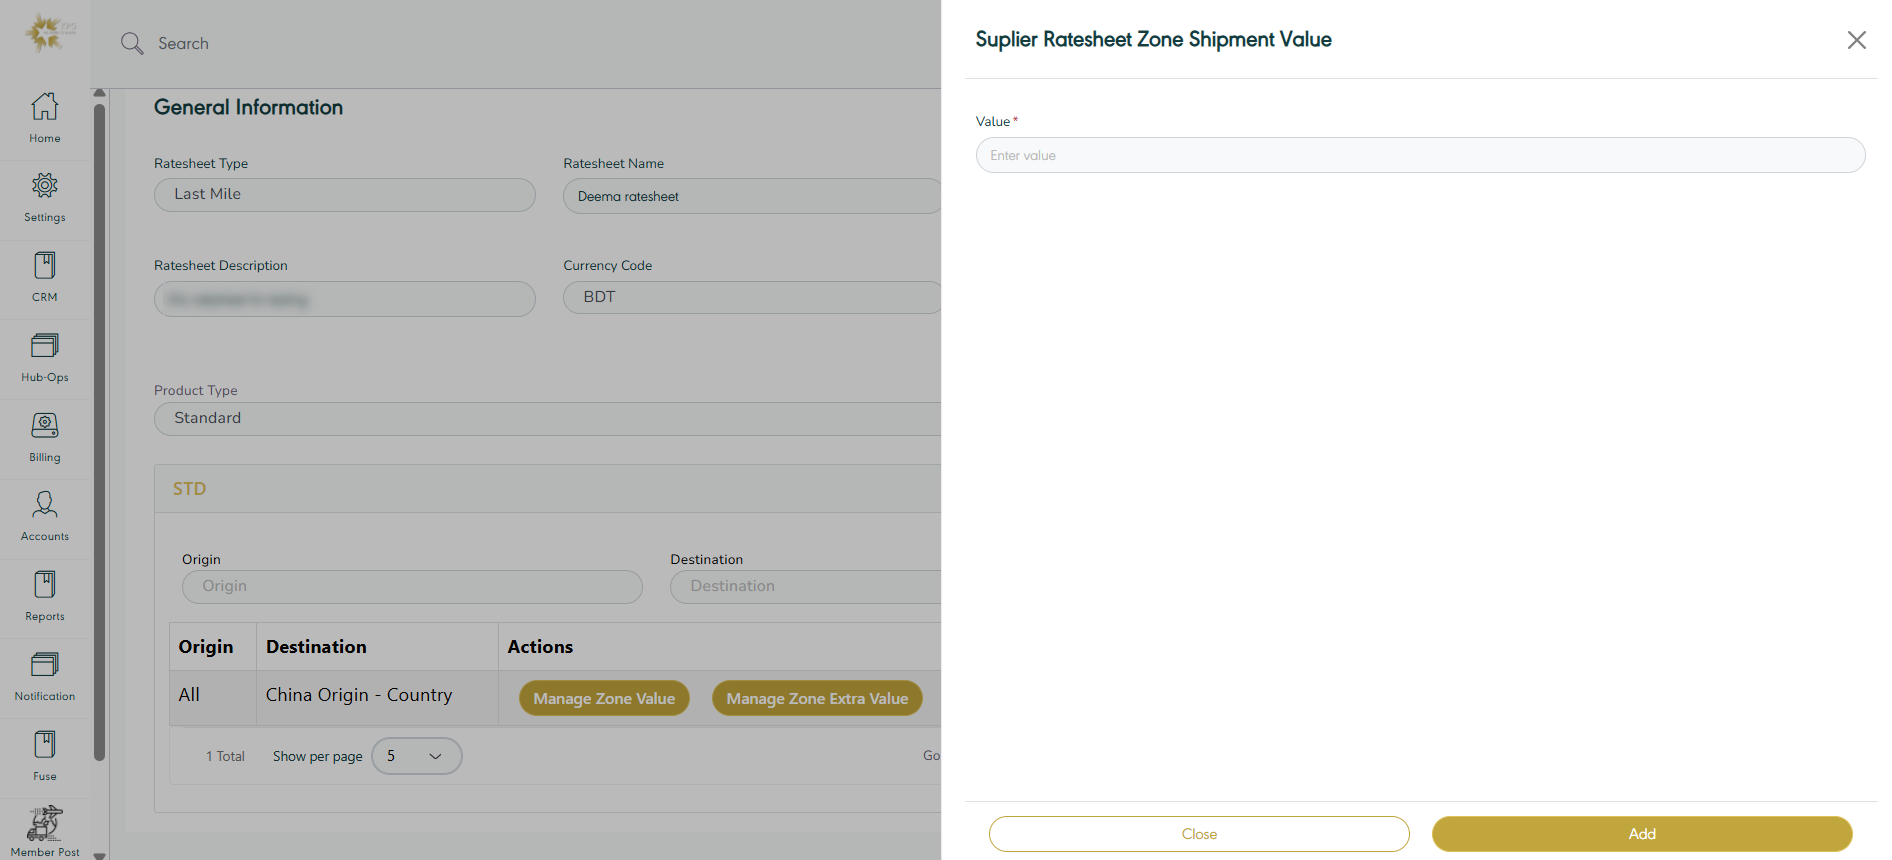
Figure 19- Manage Zone Shipment Value
By clicking on Add the system adds shipments value to the ratesheet successfully.
Note:
In case that the shipment was created with no ratesheet for its details, then the estimated costs to be recorded as Zero.
2.5 Test Ratesheet
The user can test the ratesheet by navigating to the ‘Supplier Ratesheet’ screen via the SRM Module and clicking on Test Ratesheet from Actions, as follows:
Initially, must have ready shipments created through the Hubops module. These shipments are linked to the billing system within the platform, and each shipment must have a trigger or shipment events.
Every shipment in the system is assigned to a specific supplier.
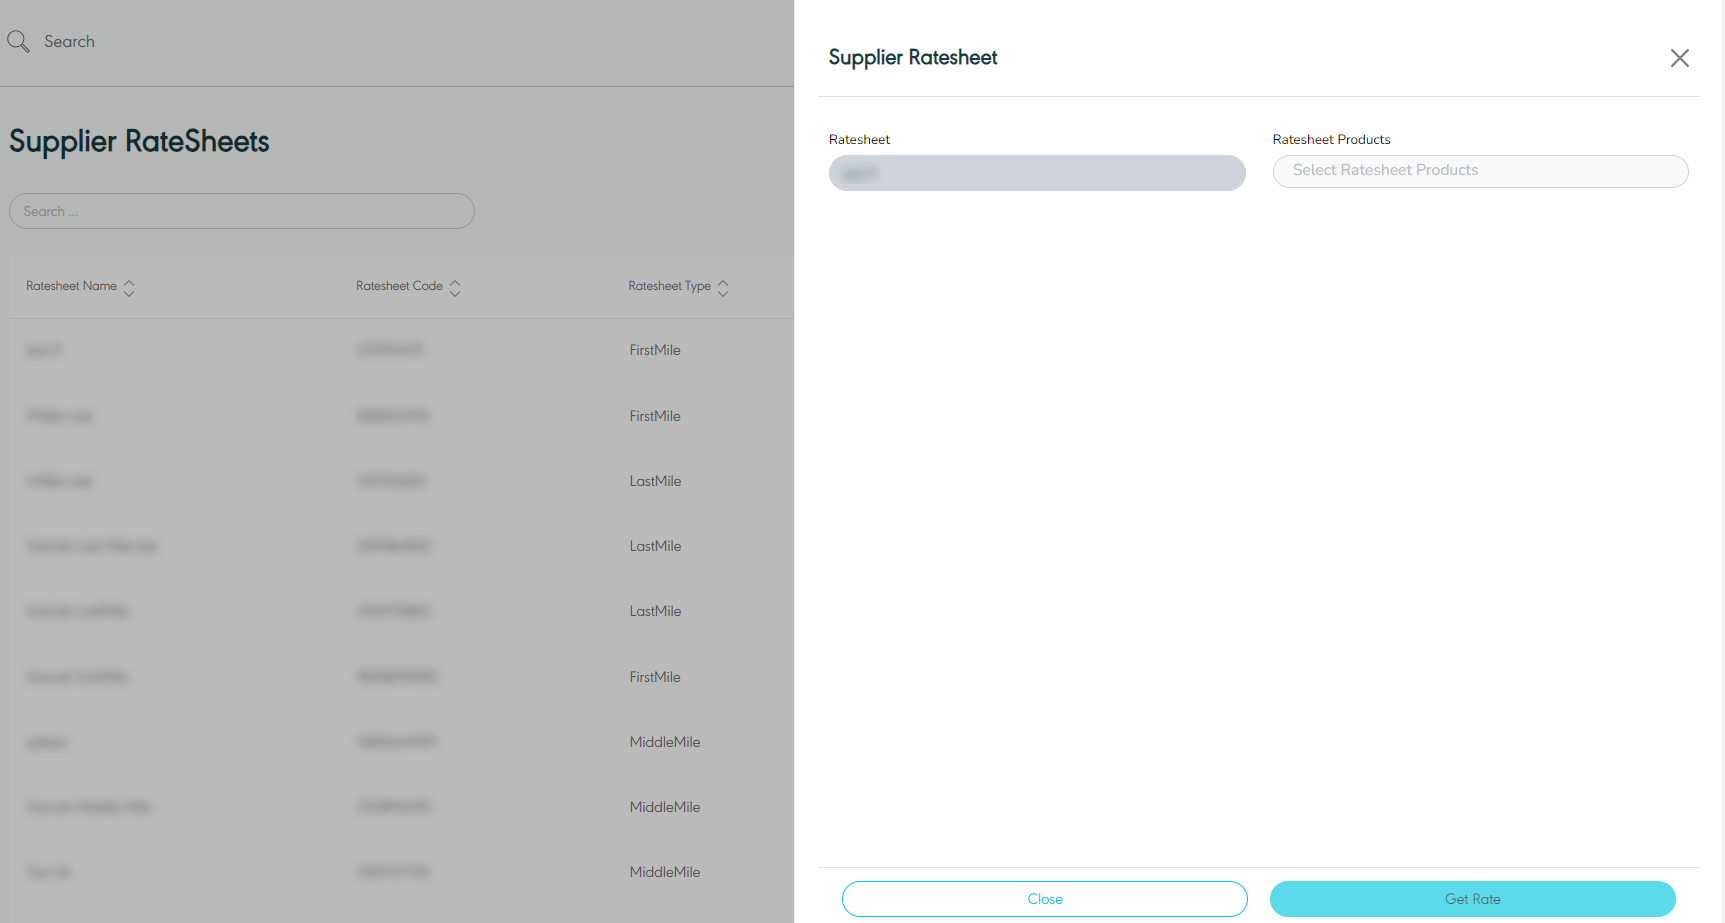
Figure 15- Test Ratesheet
By clicking on Get Rate, the system tests the reatesheet successfully.