
Setting Module

Document History
Version | Author | Reviewer/Approver | Date of Issue | Page / Section | Brief Description |
|---|---|---|---|---|---|
1.0 | Deema Z. | Asma L. | 22 Apr 2024 | Setting | First Review |
Glossary
Term | Definition |
|---|---|
Product Service | The product service indicates the type of service that will be used, where a product service can have multiple product types. |
Product Type | The product type is a specific type of the product service. |
Event | An "Event" is a recorded occurrence or happening pertaining to the shipment process. Events are systematically logged to provide a comprehensive history and real-time updates on the status and progress of shipments. |
Weight Envelope | Weight Envelope is the weight breakdown structure that is used to identify the payout of each weight range. |
Zone Template | A placeholder for defining the zone, its flows, and the countries within it to be used in the shipping ratesheet. |
Carrier | Is an individual or a commercial company, legally authorized and specialized in transporting cargo from one place to another.
|
Configuration Entry | A system setting defining parameters like preferences, application settings, and hardware configurations, allowing users to customize system behavior. |
Shipment Service | An integral component of logistics operations managing the organized transfer of goods from origin to destination, e.g. COD, DDU, DDP |
Additional property | Setting for handling the customized properties per each customer. |
IATA code | International Air Transport Association code is a three-letter alphanumeric code assigned to airports, airlines, and certain cities worldwide. This code is used providing a concise and standardized way to refer to specific airports. |
ICAO code | International Civil Aviation Organization code is a four-letter alphanumeric code assigned to airports and international coordination among aviation authorities globally. |
1. City Management
The user can view the defined cities in the system by navigating to the ‘City’ screen via the Settings Module from the left navigation panel as follows:
1.1 View Cities
The user can view the defined cities in the system by navigating to the ‘City’ screen via the Settings Module from the left navigation panel as follows:
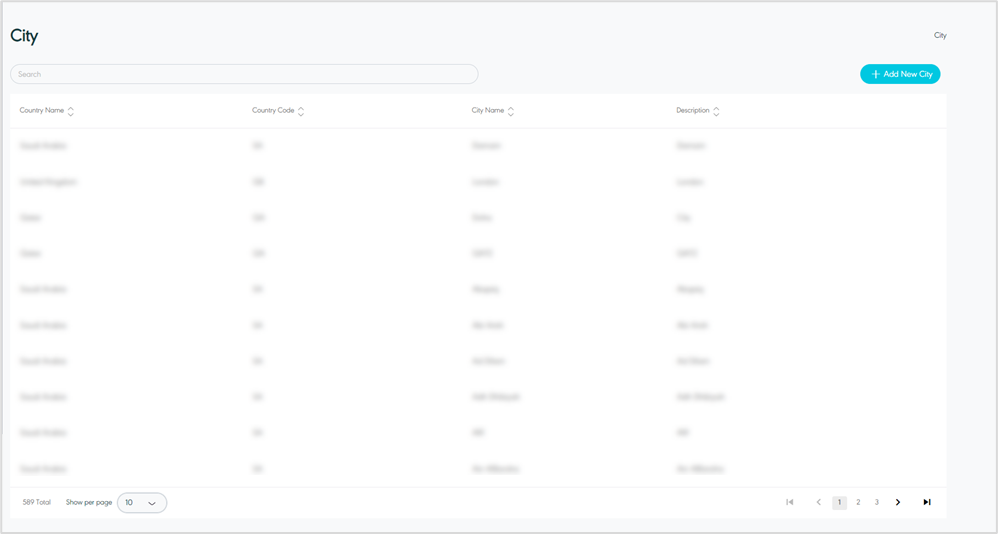
Figure 1- View Cities
Add City: the user can add a city by clicking on Add New City, referring to the Add City section.
Search: the user can search for a city by typing in the search filter field.
Show Per Page: the user can select the number of items to show on each page.
Actions: by clicking the action button the user can edit city details by referring toEdit City and delete city by referring to Delete City as follows:
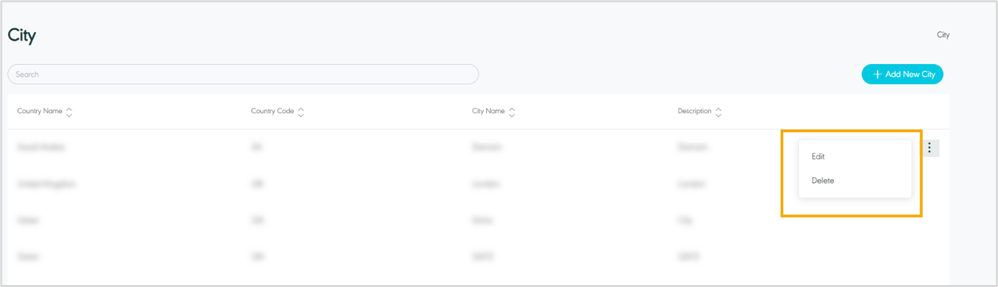
Figure 2- City Related Actions
1.2 Add New City
The user can add a new city by navigating to the ‘City’ screen via Settings Module and clicking on Add City as follows:
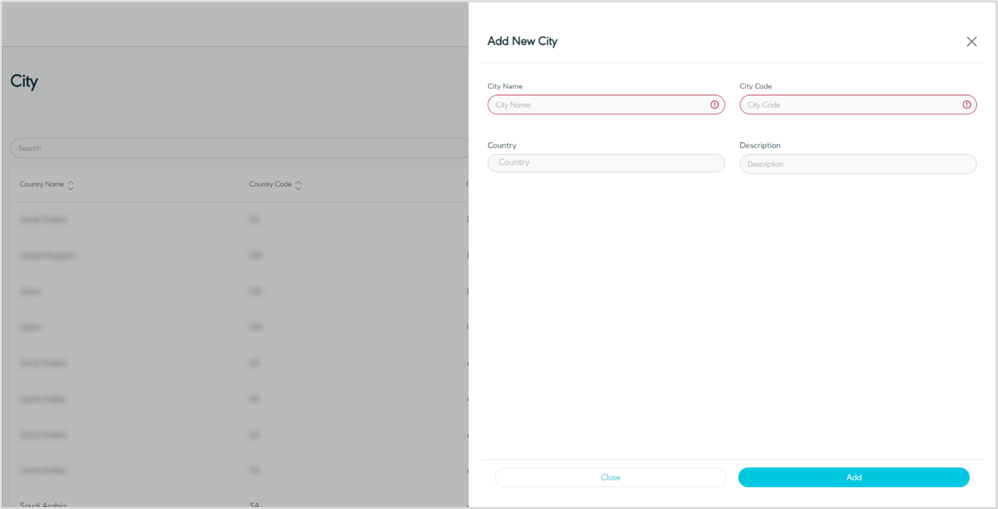
Figure 3- Add New City
City Name: this field represents the City’s name.
Country Code: this field represents the country’s code.
Country: this field represents the country where the city is located.
Description: this field represents the city’s description.
By clicking on Save, the system adds a new city successfully.
1.3 Edit City
The user can edit the city information by navigating to the ‘City’ screen via the Settings Module and clicking on Edit from Actions as follows:

Figure 4- Edit City
1.4 Delete City
The user can delete a city by navigating to the ‘City’ screen via the Settings Module and clicking on Delete from Actions.
2. Product Type Management
The purpose of this feature is to define and manage the product types along with their associated configurations.
2.1 View Product Type
The user can view the defined product types in the system by navigating to the ‘Product Type’ screen and choosing the Settings Module from the left navigation panel as follows:

Figure 5- View Product Type
Search: the user can search for the product type by using the search field.
Show Per Page: the user can select the number of items to show on each page.
Add New Product Type: the user can add a new product type by clicking on Add New Product Type, referring to the Add Product Type section.
Actions: by clicking on action button the user can edit product type by referring to Edit Product Type and delete specific product type by referring to Delete Product Type as follows:
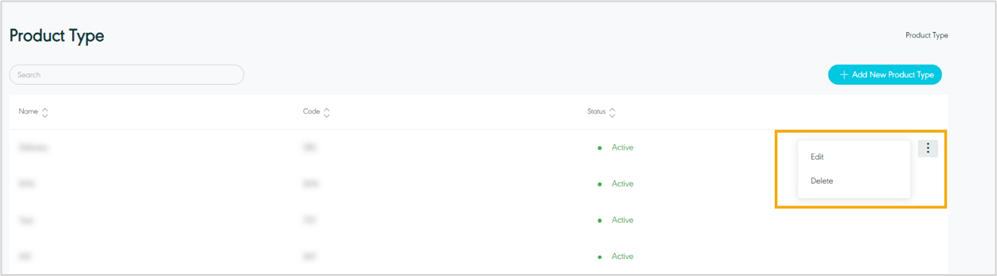
Figure 6- Product Type Related Actions
2.2 Add Product Type
The user can add a new Product Type by navigating to the ‘Product Type’ screen via Settings Module and clicking on Add New Product Type as follows:

Figure 7- Add New Product Type
Product Type Name: this field represents the product type’s name.
Product Type Code: this field represents the product type’s code.
Product Type Description: this field represents the description of the product type.
Product Service: this field represents the product service to be linked to the created product type.
Product Type Parcel Type: this field represents the parcel type of the product, i.e., Document and Non-Document.
Product Type Flow: this field represents the type of service of the product, i.e., International or local.
Product Type Status: this field represents the status of the created product type, i.e., active or inactive.
Product Type is Collectable: By marking this option, you identify the product as collectable, i.e., this allows the consignee to pick up the shipment from a specific location.
Translation: the user can add the translation of the product type.
By clicking on Add, the system adds a new Product type successfully.
2.3 Edit Product Type
The user can edit product type information by navigating to the ‘Product Type’ screen via the Settings Module and clicking on Edit from Action, as follows:
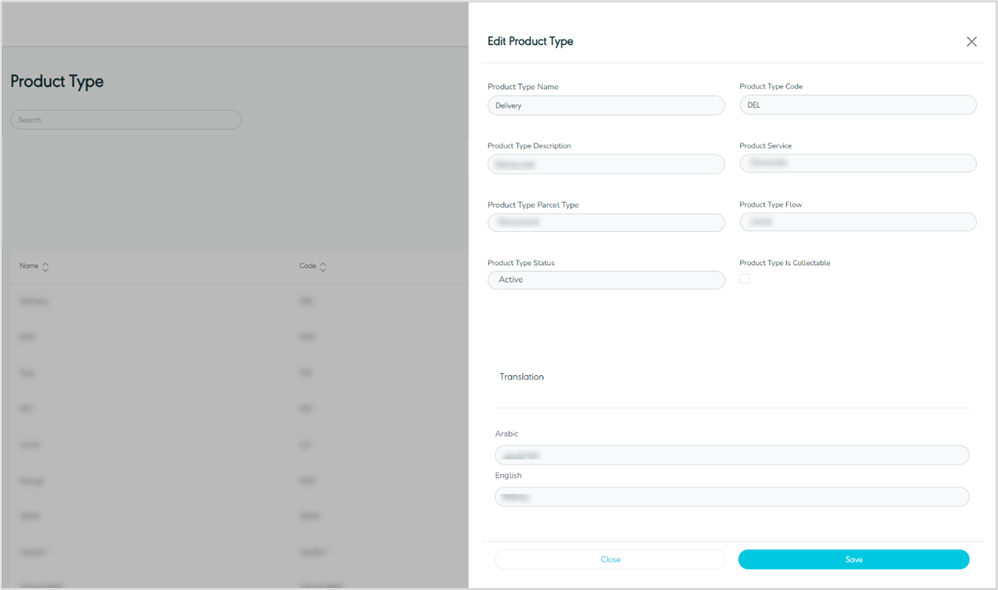
Figure 8- Edit Product Type
By clicking on Save, the system updates the Product Type successfully.
2.4 Delete Product Type
The user can delete a product type by navigating to the ‘Product Type’ screen via the Settings module and clicking on Delete from Actions.
3. Event Management
The purpose of this feature is to define and manage the Events along with their associated configurations.
3.1 View Event
The user can view the defined Events in the system by navigating to the ‘Events’ screen by choosing the Settings Module from the left navigation panel as follows:
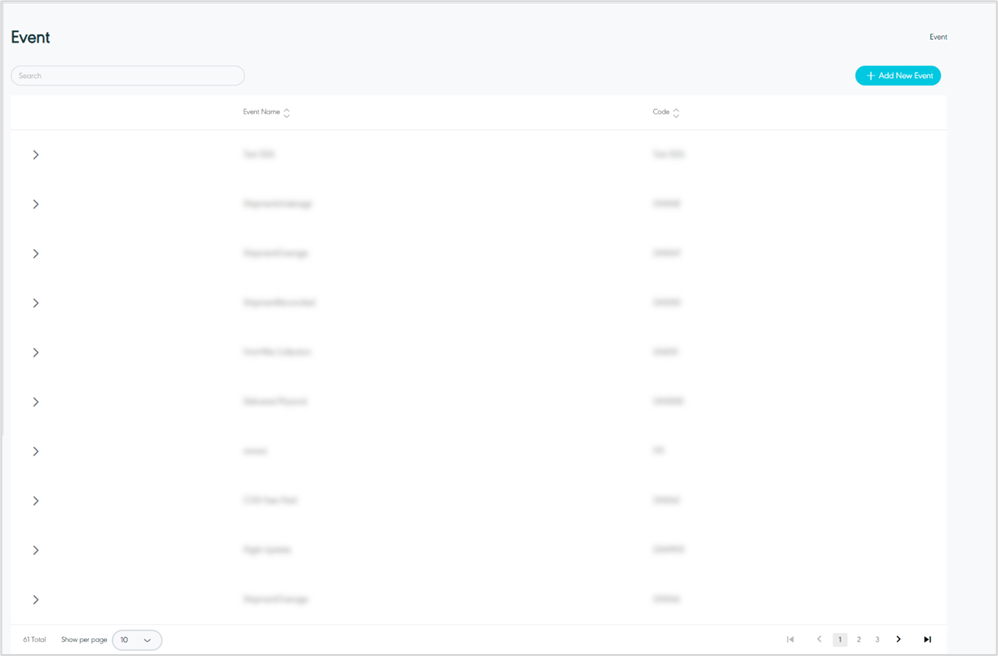
Figure 9 - View Events
Search: the user can search for the Events by typing in the search filter field.
Show Per Page: the user can select the number of items to show on each page.
Add New Event: the user can add a new Event by clicking on Add New Event, referring to Add New Event section.
Actions: by clicking on action button the user can edit Event details by referring to Edit Event and delete event by referring to Delete Event as follows:
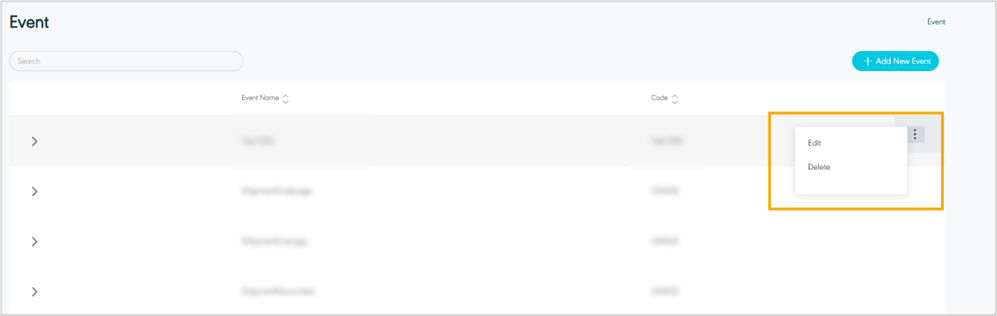
Figure 10 - Events Related Actions
3.2 Add New Event
The user can add new Event by navigating to the ‘Event’ screen via Settings Module and clicking on Add New Event as follow:

Figure 11- Add New Event
Event Name: this field represents the name of Event.
Code: this field represents the Event’s code(a unique alphanumeric value).
Event Description: this field represents the description of Event.
Display Name: this field represents how the Event name will be displayed.
Display on Web: this field represents that the event is viewable externally on all web applications.
Event Category: this field represents the category of Event, i.e., Shipment or MAWB.
Product Type status: this field represents the status of product type when created.
Is Problem: by marking this option, the event created can be applied to shipments encountering any problem within the shipment lifecycle.
Is Customer Viewable: by marking this option, the event is viewable on the customer platform.
Is System Event: by marking this option, the event is considered as a system event.
Is Closure: marking this option indicates that this event is the last event in the shipment cycle.
Physical Event: marking this option indicates that the created event is a physical event applied to the shipment.
Is Parent: marking this option indicates that the created event is a parent event, used to build event hierarchy and interrelate events.
Translation: the user can add the translation of the event.
By clicking on Save, the system adds new Event successfully.
3.3 Edit Event
The user can edit the Event information by clicking on Edit from Actions, and navigating to the ‘Event’ screen via the Settings Module as follows:
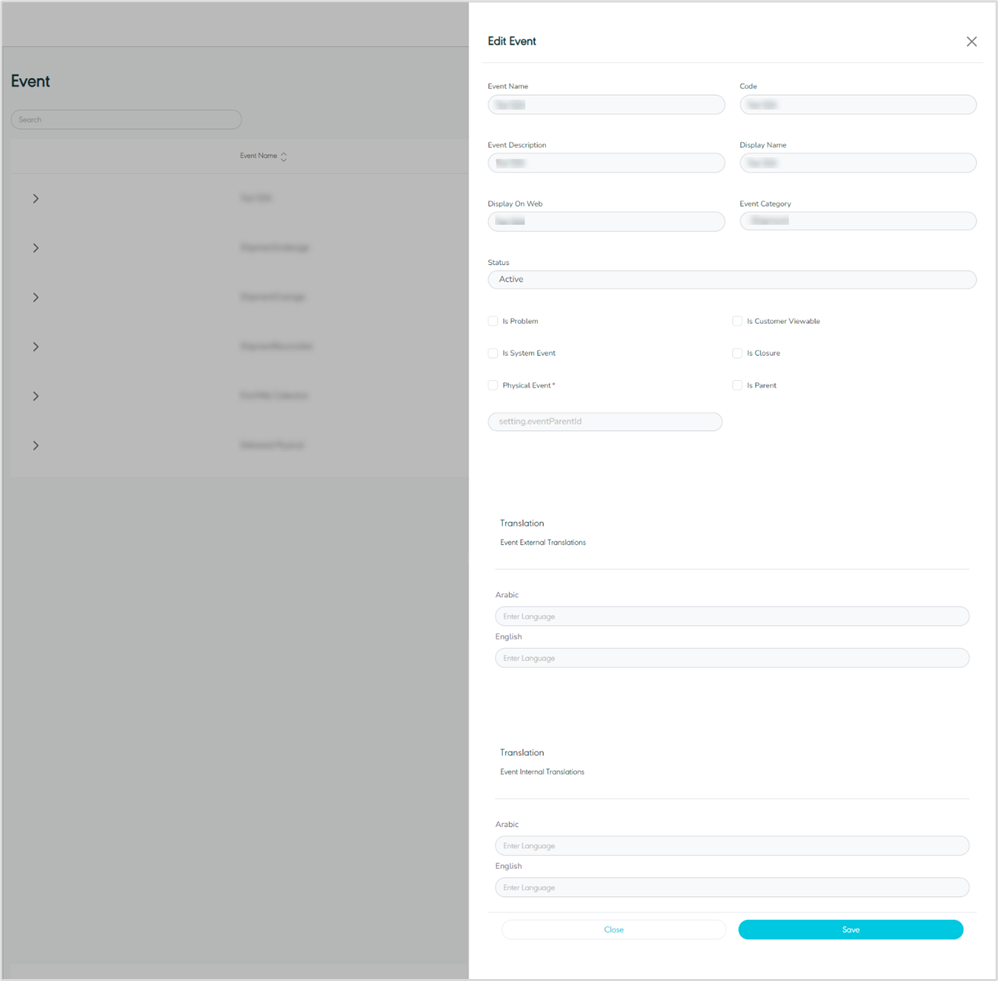
Figure 12 - Edit Event
By clicking on Save, the system updates the Event successfully.
3.4 Delete Event
The user can delete an event by navigating to the ‘Event’ screen via the Settings Module and clicking on Delete from Actions.
4. Product Service Management
The purpose of this feature is to define and manage the Product Services along with their associated configurations, where each Product Service can have multiple product types.
4.1 View Product Service
The user can view the defined Product Services in the system by navigating to the ‘Product Service’ screen via the Settings Module from the left navigation panel as follows:
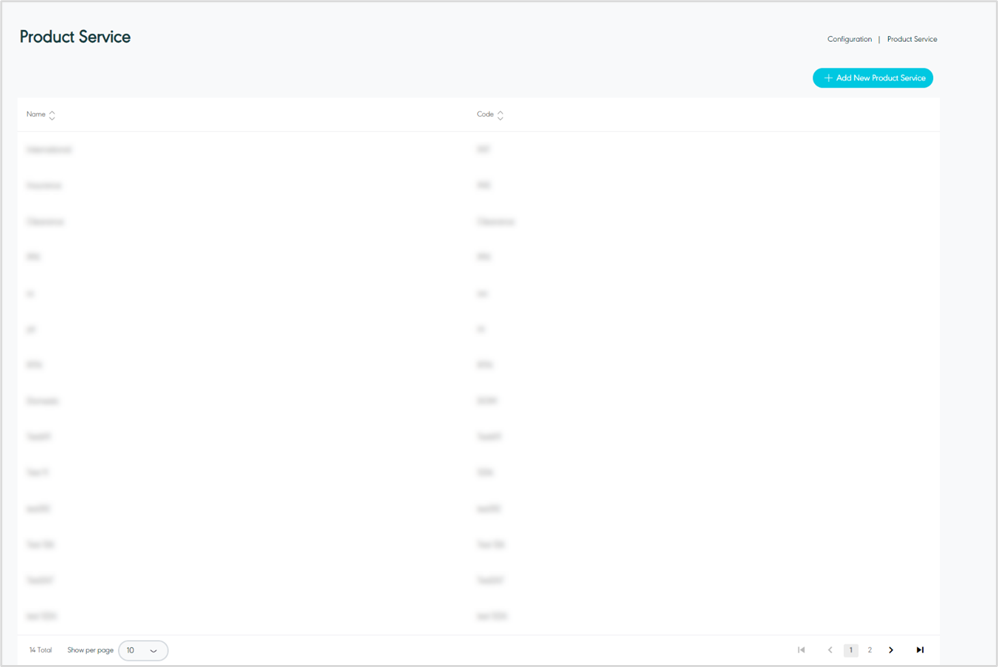
Figure 13- View Product Service
Search: the user can search for the Product service by typing in the search filter field.
Show Per Page: the user can select the number of items to show on each page.
Add New Product Service: the user can add a new product service by clicking on Add New Product Service, by referring to the Add New Product Servicesection.
Actions: by clicking on action button the user can view product service details by referring to View Product Service Details or edit Product Service details by referring to Edit Product Service as follows:
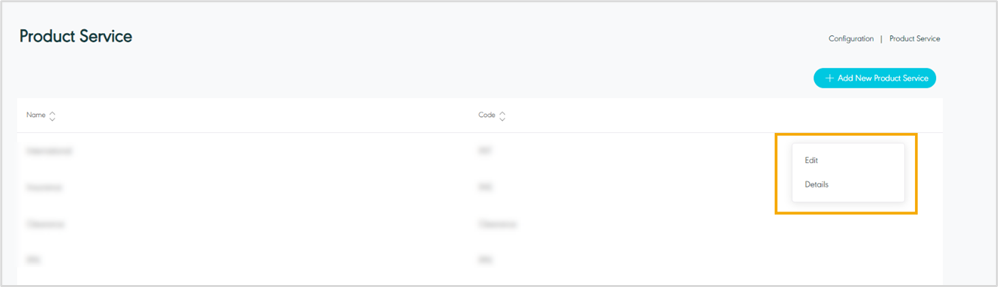
Figure 14- Product Service-Related Actions
4.2 View Product Service Details
The user can view the details of the product service by navigating to the ‘Product Service’ screen via the Settings Module as below:
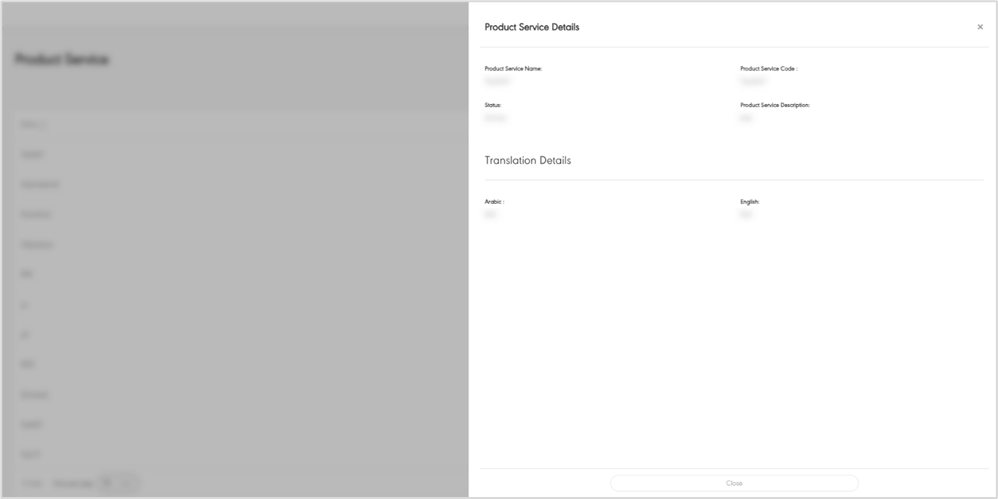
Figure 15- View Product Service Details
4.3 Add Product Service
The user can add a new product service by navigating to the ‘Product Service’ screen via Settings Module and clicking on Add New Product Service as follows:

Figure 16- Add Product Service
Product Service Name: this field represents the name of the product service.
Product Service Code: this field represents the code of the product service.
Product Service Description: this field represents the description of the product service.
Status: this field represents the status of the created product service.
Is Return: By marking this field, the created product service will be considered a return service.
Translation: the user can add the translation of the product service.
By clicking on Save, the system adds a new Product Service successfully.
4.4 Edit Product Service
The user can edit the product service information by navigating to the ‘Product Service’ screen via the Settings Module and clicking on Edit from Actions, as follows;
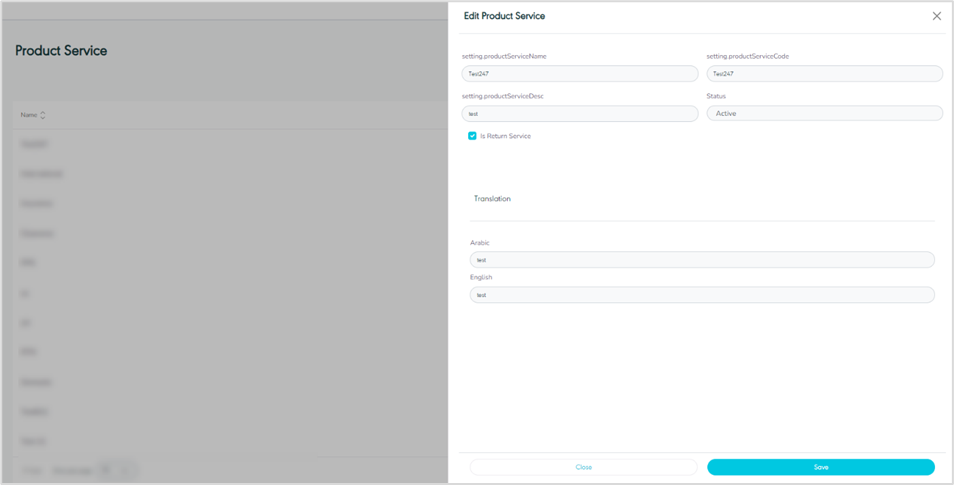
Figure 17- Edit Product Service
By clicking on Save, the system updates the Product Service successfully.
5. Weight Envelopes Management
The purpose of this feature is to manage the weight envelopes i.e. the defined weight ranges, where users can view the weight envelopes, edit and delete existing ones when necessary.
5.1 View Weight Envelope
The user can view the defined weight envelopes in the system by choosing the Settings Module from the left navigation panel and navigating to the ‘Weight Envelope’ screen as follows:
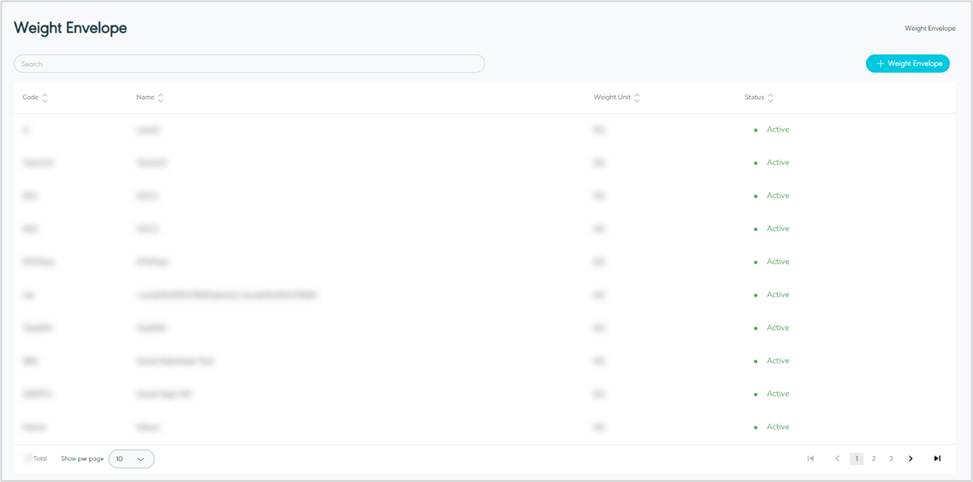
Figure 18- View Weight Envelope
Search: the user can search for the weight envelopes by typing the weight envelope name or code in the search filter field.
Show Per Page: the user can select the number of items to show on each page.
Actions: by clicking on actions button, the user can view specific weight envelope details by referring to View Weight Envelope Details and edit weight envelope by referring to Edit Weight Envelope and delete weight envelope by referring to Delete Weight Envelope as follows:
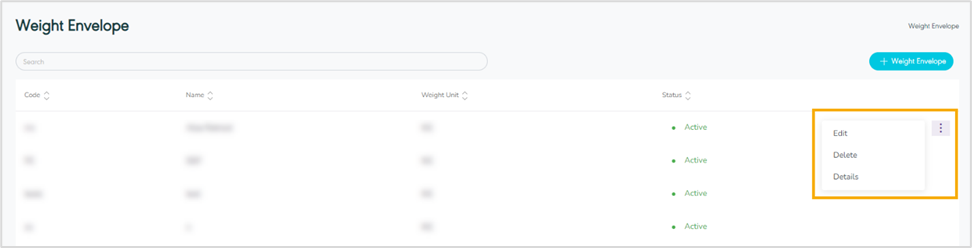
Figure 19- Weight Envelope Related Actions
5.2 View Weight Envelope Details
The user can view the details of the weight envelope by navigating to the ‘Weight Envelope’ screen via the Settings Module and clicking on Details from Actions as follows:
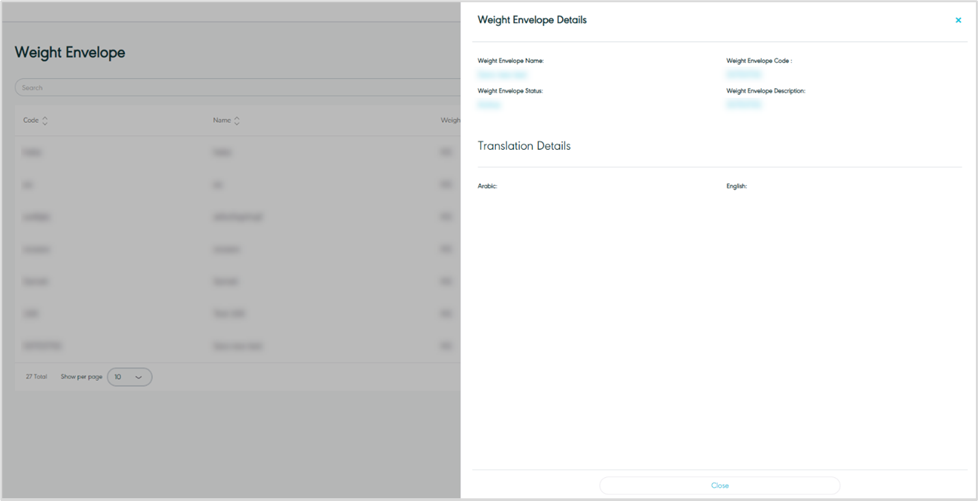
Figure 20- View Weight Envelope Details
5.3 Add Weight Envelope
The user can add a new Weight Envelope by navigating to the ‘Weight Envelope’ screen via Settings Module and clicking on Add Weight Envelope as follows:
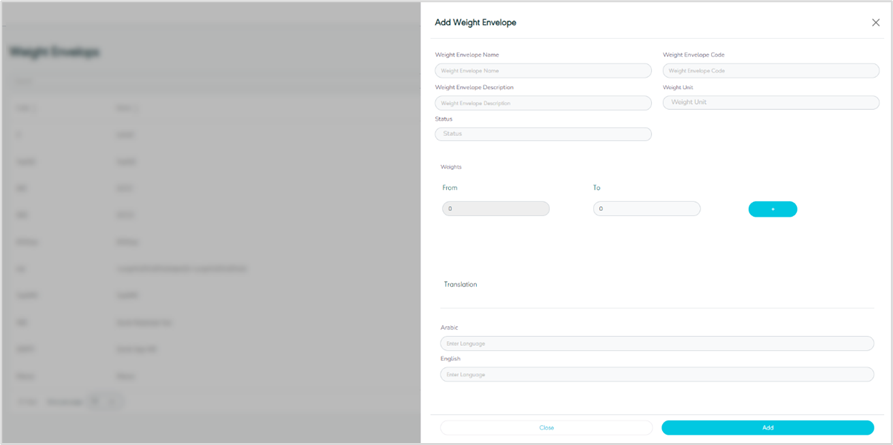
Figure 21- Add Weight Envelope
Weight Envelope Name: this field represents the name of the weight envelope.
Weight Envelope Code: this field represents the code of the weight envelope.
Weight Envelope Description: this field represents the description of the weight envelope.
Weight Unit: this field represents the weight unit of the envelope.
Weights From – To fields: this field represents the upper and lower value for the added weight range, the user can enter multiple ranges as needed.
Status: this field represents the status of the created weight envelope.
Translation: the user can add the translation of the weight envelope.
By clicking on Add, the system adds a new weight envelope successfully.
5.4 Edit Weight Envelope
The user can edit the information on the weight envelope by navigating to the ‘Weight Envelope’ screen via the Settings Module and clicking on Edit from Actions as follows:
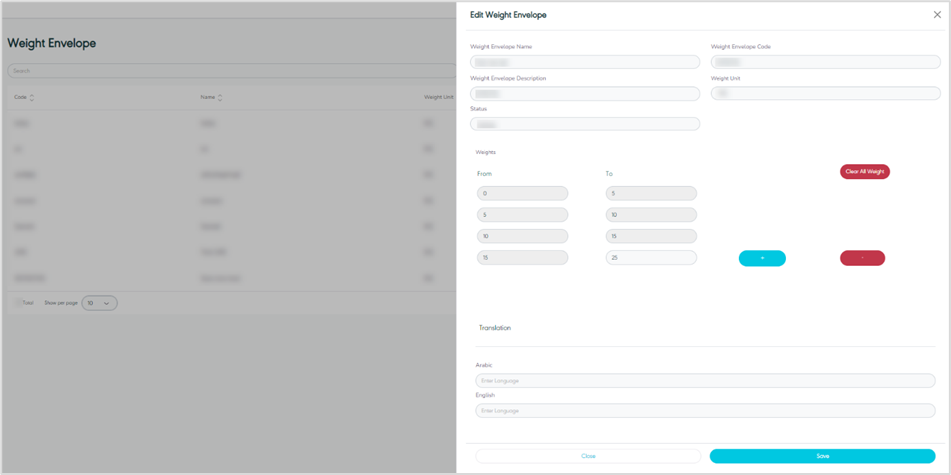
Figure 22- Edit Weight Envelope
By clicking on Save, the system updates the weight envelope details successfully.
5.5 Delete Weight Envelope
The user can delete a weight envelope by navigating to the ‘Weight Envelope’ screen via the Settings Module and clicking on Delete from Actions:
6. Zone Templates Management
The purpose of this feature is to allow the user to manage the defined zone templates in the system. The user can also view and edit zone templates when necessary.
6.1 View Zone Templates
The user can view the defined Zone Templates in the System by choosing the Settings Module from the left navigation panel and navigating to the ‘Zone Templates’ screen as follows:
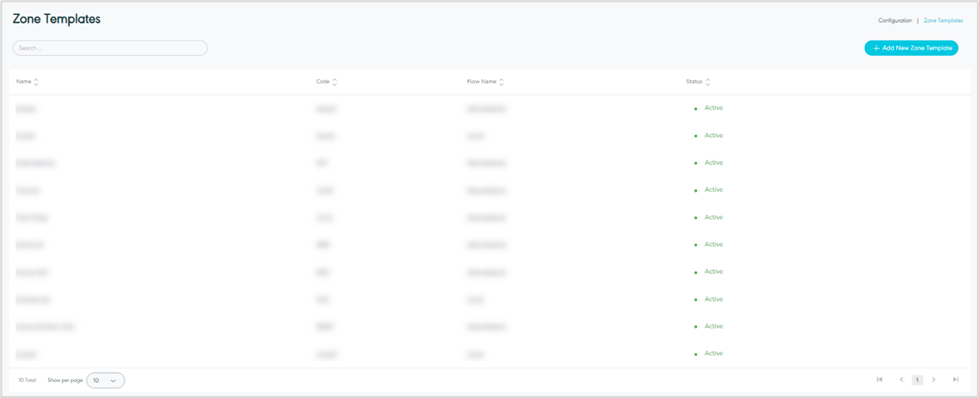
Figure 23- View Zone Templates
Search: the user can search for the Zone Templates by typing the name or code of the zone templates in the search field.
Show Per Page: the user can select the number of items to show on each page.
Add New Zone Template: the user can add a new Zone Template service by clicking on Add New Zone Template, referring to the Add New Template section.
Actions: by clicking on actions button the user can edit Zone Template details by referring to Edit Zone Template, view zone template details by referring to View Zone Template Details and manage zone template by referring to Manage Zone Template as follows:
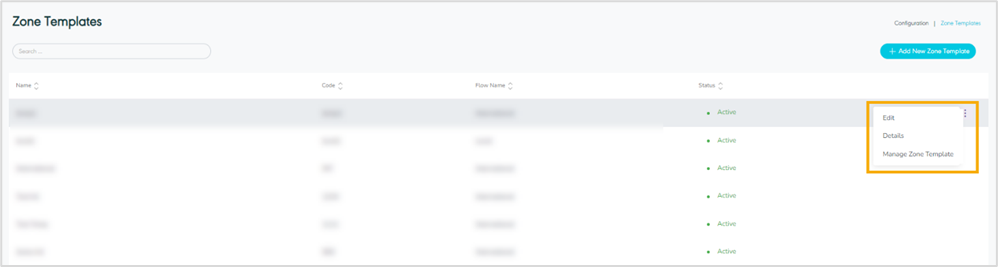
Figure 24- Zone Templates Related Actions
6.2 View Zone Template Details
The user can view more details by clicking on Actions then Details as follows:
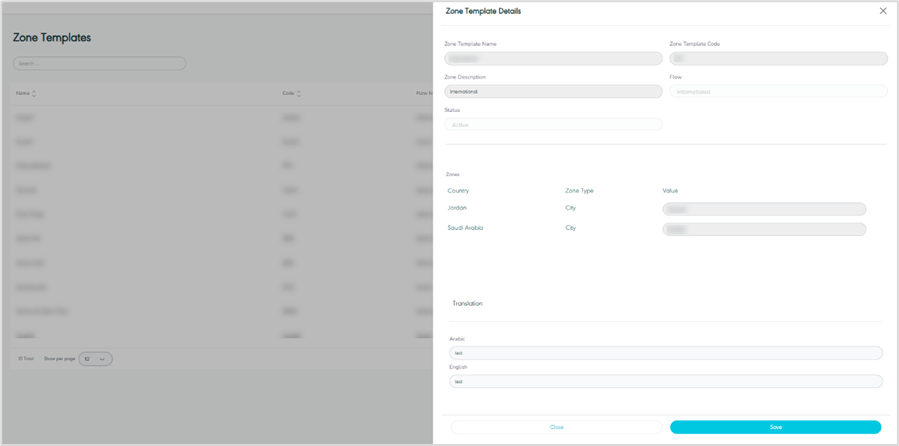
Figure 25 - View Zone Template Details
6.3 Add Zone Template
The user can add a new Zone Template by navigating to the ‘Zone Template’ screen via Settings Module and clicking on Add New Zone Template as follows:

Figure 26- Add Zone Template
Zone Template Name: this field represents the name of the Zone Template.
Zone Template Code: this field represents the code of the Zone Template.
Zone Description: this field represents the description of the Zone.
Flow: this field represents the type of the Zone, i.e., local or international.
Status: this field represents the status of the created zone.
Translation: the user can add the translation of the Zone template.
By clicking on Save, the system adds a new Zone Template successfully.
6.4 Edit Zone Template
The user can edit the Zone Template information by navigating to the ‘Zone Template’ screen via the Settings Module and clicking on Edit from Actions, as follows:
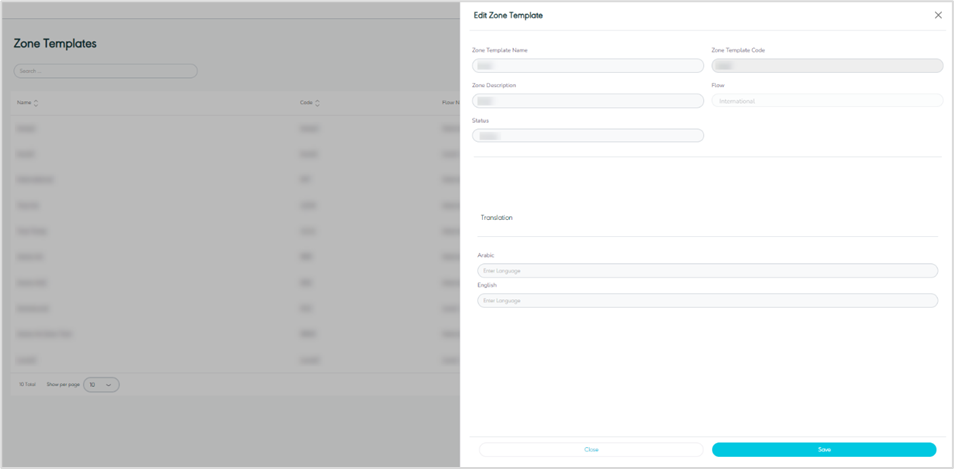
Figure 27- Edit Zone Template
By clicking on Save, the system updates the Zone Template successfully.
6.5 Manage Zone Template
The user can manage a specific zone template by navigating to the ‘Zone Template’ screen via the Settings Module and clicking on Manage Zone Template from Actions, as follows:
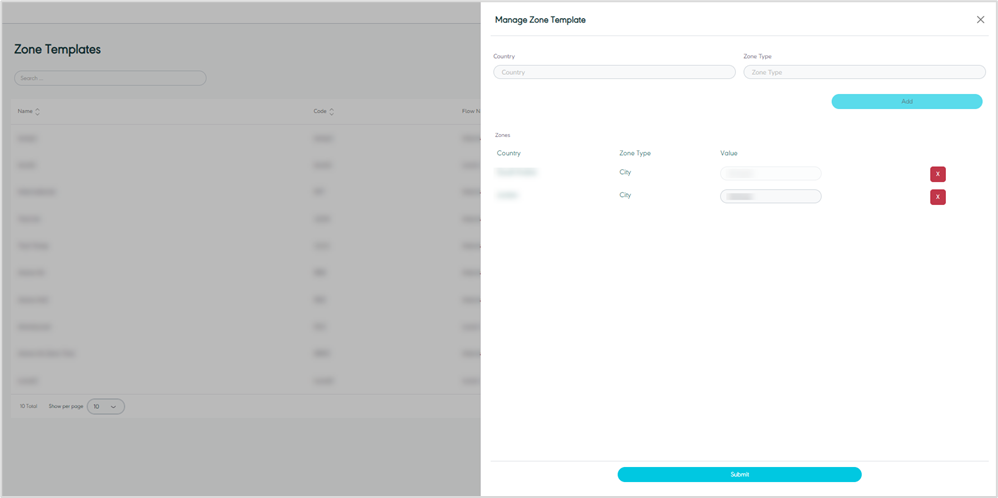
Figure 27 - Manage Zone Template
7. Shipment Services Management
The purpose of this feature is to define and manage the Shipment Services along with their associated configurations.
7.1 View Shipment Services
The user can view the defined Shipment Services in the system by navigating to the ‘Shipment Services’ screen via the Settings Module from the left navigation panel as follows:
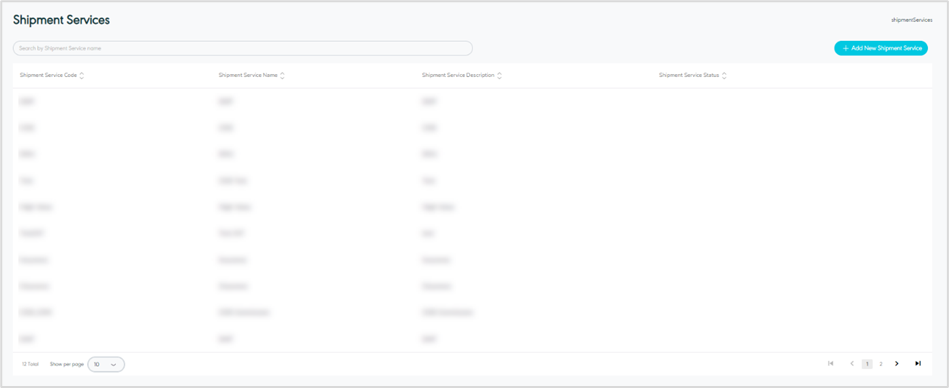
Figure 28- View Shipment Services
Search: the user can search for the Shipment services by typing in the search filter field.
Show Per Page: the user can select the number of items to show on each page.
Add New Shipment Service: the user can add a new shipment service by clicking on Add New Shipment Service, referring to the Add New Shipment Service section.
Actions: by clicking on action button the user can view Shipment Service details referring to View Shipment Service Details, edit Shipment Service details by referring to Edit Shipment Service and delete shipment service by referring to Delete Shipment Service as follows:
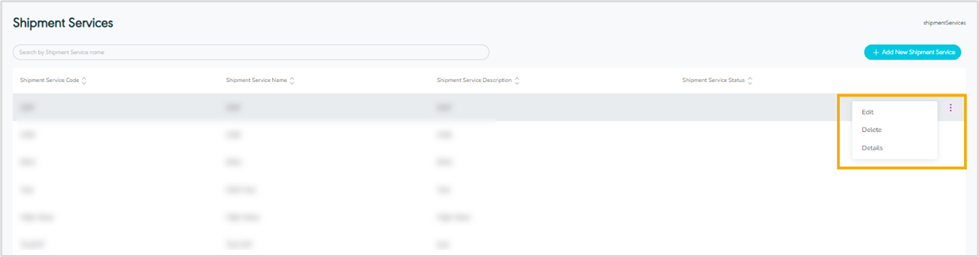
Figure 29 - Shipment Services Related Actions
7.2 View Shipment Service Details
The user can view more details by clicking on Actions then Details as follows:
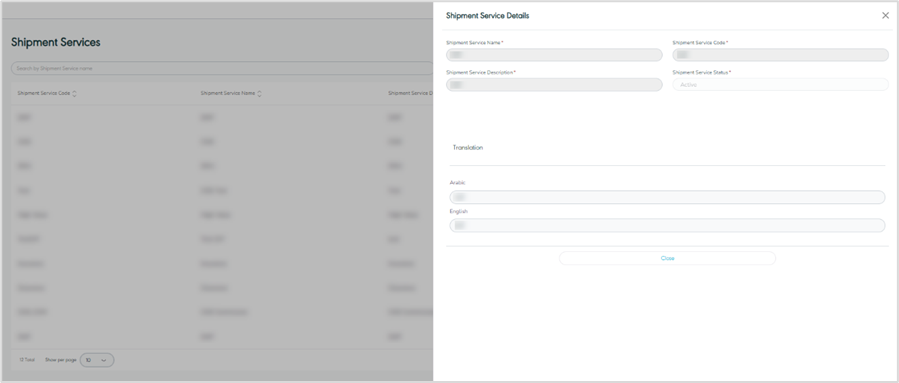
Figure 30 - View Shipment Service Details
7.3 Add Shipment Service
The user can add a new shipment service by navigating to the ‘Shipment Service’ screen via Settings Module and clicking on Add New Shipment Service as follows:
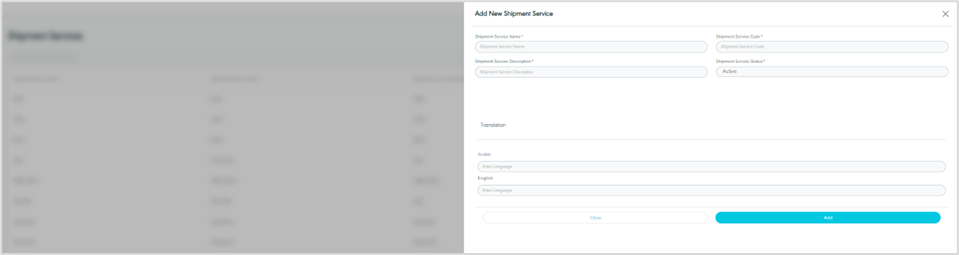
Figure 31 - Add Shipment Service
Shipment Service Name: this field represents the name of the shipment service.
Shipment Service Code: this field represents the code of the shipment service.
Shipment Service Description: this field represents the description of the shipment service.
Shipment Service Status: this field represents the status of the created shipment service.
Translation: the user can add the translation of the shipment service.
By clicking on Save, the system adds a new Shipment Service successfully.
7.4 Edit Shipment Service
The user can edit the shipment service information by navigating to the ‘Shipment Services’ screen via the Settings Module and clicking on Edit from Actions as follows:
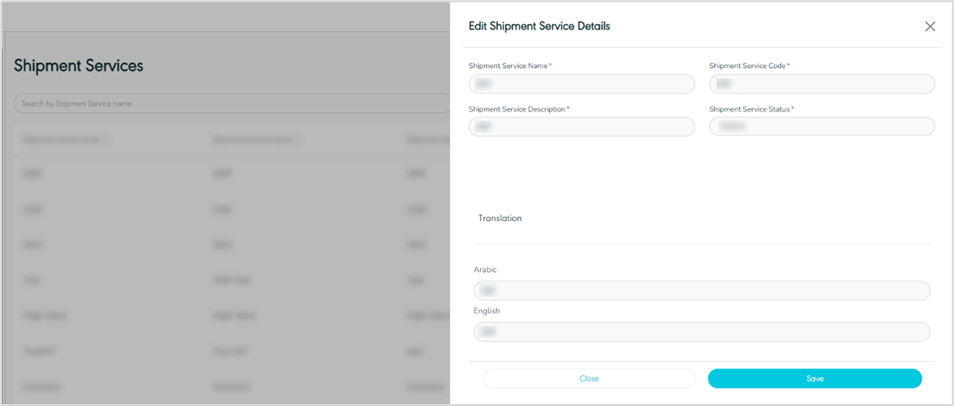
Figure 32- Edit Shipment Service
By clicking on Save, the system updates the Shipment Service successfully.
8.5 Delete Shipment Service
The user can delete a Shipment service by navigating to the ‘Shipment Services’ screen via the Settings Module and clicking on Delete from Actions:
8. Airport Management
The purpose of this feature is to define and manage the Airports in the system along with their associated configurations.
8.1 View Airports
The user can view the defined Airports in the system by navigating to the ‘Airports’ screen via the Settings Module from the left navigation panel as follows:
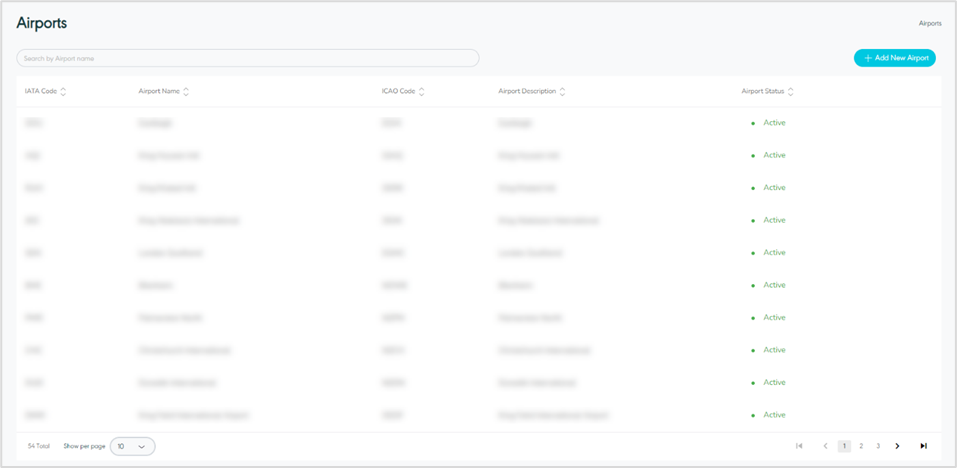
Figure 33- View Airports
Search: the user can search for the Airports by typing in the search filter field.
Show Per Page: the user can select the number of items to show on each page.
Add New Airport: the user can add a new airport by clicking on Add New Airport, referring to the Add New section.
Actions: by clicking on action button the user can view Airport details referring to View Airport Details, edit Airport details by referring to Edit Airport and delete airport by referring to Delete Airport as follows:
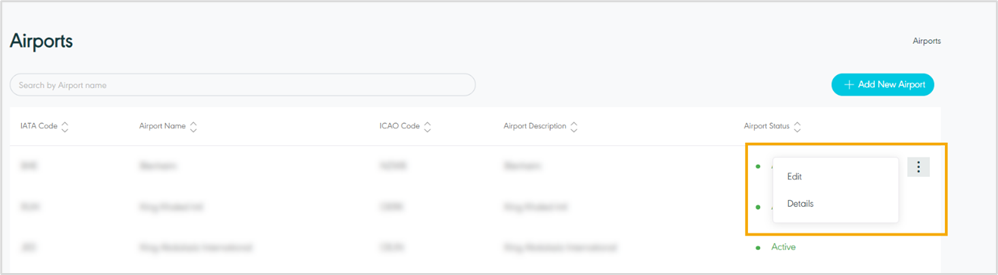
Figure 34 – Airports Related Actions
8.2 View Airport Details
The user can view more details by clicking on Actions then Details as follows:
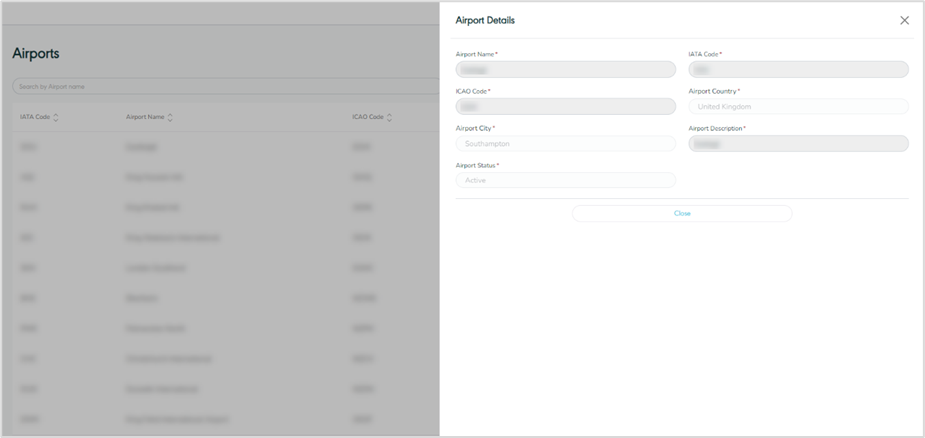
Figure 35- View Airport Details
8.3 Add Airport
The user can add a new Airport by navigating to the ‘Airport’ screen via Settings Module and clicking on Add New Airport as follows:
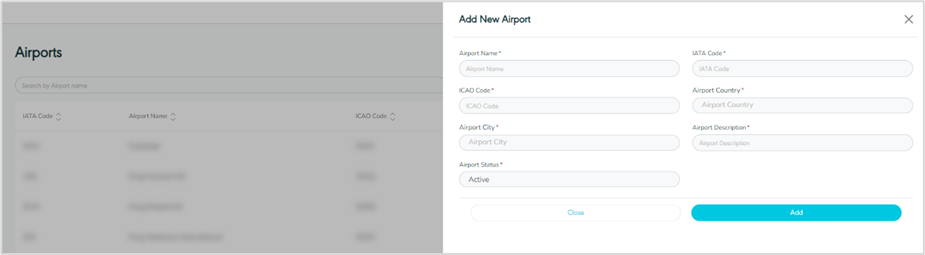
Figure 36 - Add New Airport
Airport Name: this field represents the name of the Airport.
IATA Code: this field represents IATA code.
ICAO Code: this field represents ICAO code.
Airport Country: this field represents the Airport country name.
Airport City: this field represents the Airport city name.
Airport Description: this field represents the description of the airport.
Airport Status: this field represents the status of the created airport.
By clicking on Add, the system adds a new Airport successfully.
8.4 Edit Airport
The user can edit the Airport information by navigating to the ‘Airport’ screen via the Settings Module and clicking on Edit from Actions as follows:
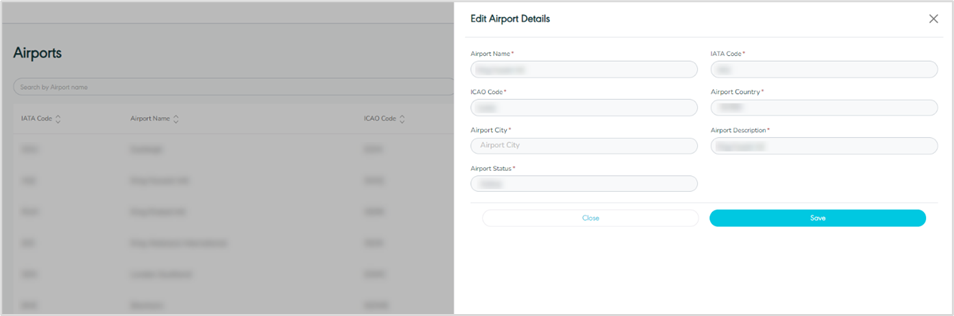
Figure 37- Edit Airport
By clicking on Save, the system updates the Airport successfully.
9.5 Delete Airport
The user can delete an airport by navigating to the ‘Airport’ screen via the Settings module and clicking on Delete from Actions.
9. Carrier Management
The purpose of this feature is to define and manage the Carriers in the system along with their associated configurations.
9.1 View Carrier
The user can view the defined Carriers in the system by navigating to the ‘Carriers’ screen via the Settings Module from the left navigation panel as follows:
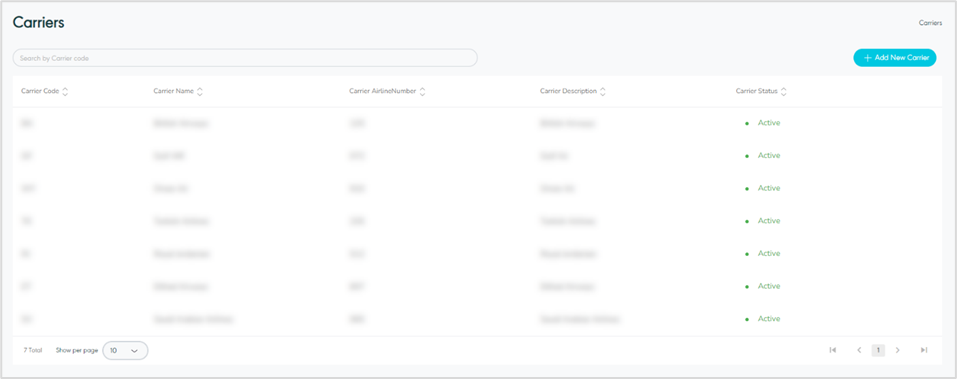
Figure 38- View Carriers
Search: the user can search for the Carriers by typing in the carrier’s name or code in the search filter field.
Show Per Page: the user can select the number of items to show on each page.
Add New Carrier: the user can add a new carrier by clicking on Add New Carrier, referring to the Add New Carrier section.
Actions: by clicking on action button the user can view Carrier details referring to View Carrier Details, edit Carrier details by referring to Edit Carrier and delete carrier by referring to Delete Carrier as follows:
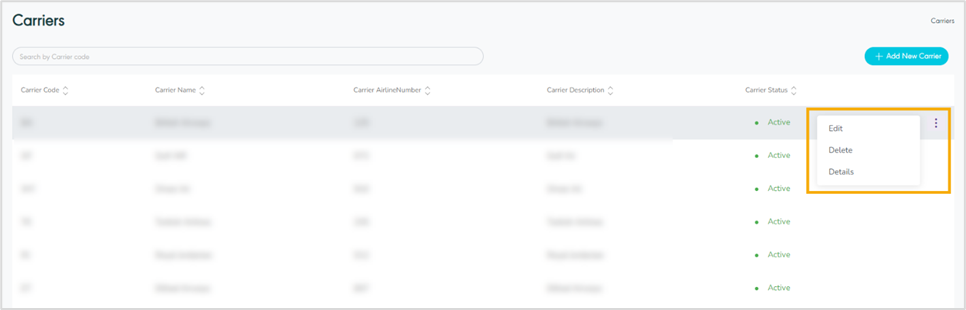
Figure 39 – Carriers Related Actions
9.1 View Carrier Details
The user can view more details by clicking on Actions then Details as follows:
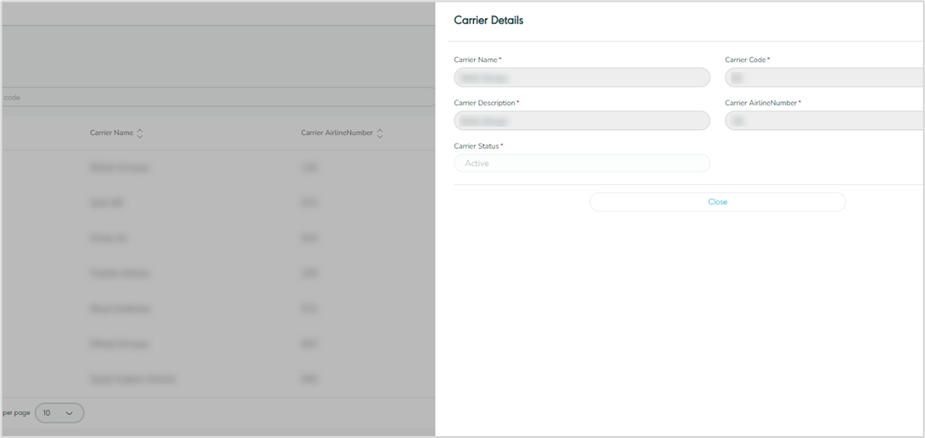
Figure 40 - View Carrier Details
9.2 Add Carrier
The user can add a new Carrier by navigating to the ‘Carrier’ screen via Settings Module and clicking on Add New Carrier as follows:
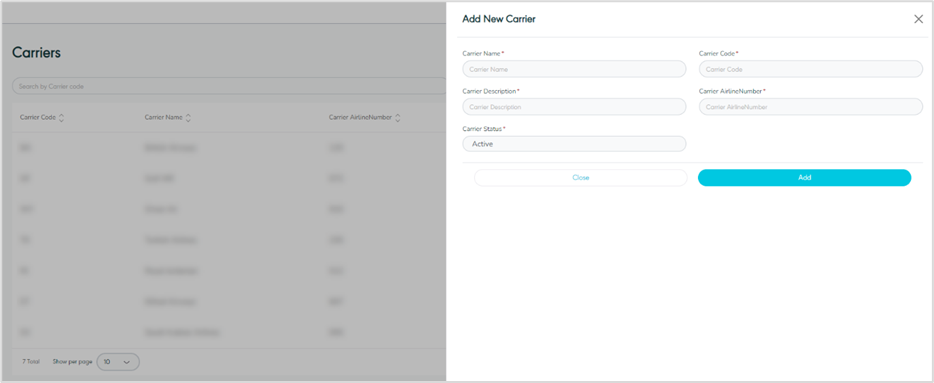
Figure 41 - Add New Carrier
Carrier Name: this field represents the name of the Carrier.
Carrier Code: this field represents the Carrier code.
Carrier Description: this field represents the description of the added carrier.
Carrier Airline Number: this field represents the Airline number associated with the carrier.
Carrier Status: this field represents the status of the created carrier, e.g., active, or inactive.
By clicking on Add, the system adds a new Carrier successfully.
9.3 Edit Carrier
The user can edit Carrier information by navigating to the ‘Carrier’ screen via the Settings Module and clicking on Edit from Actions as follows:
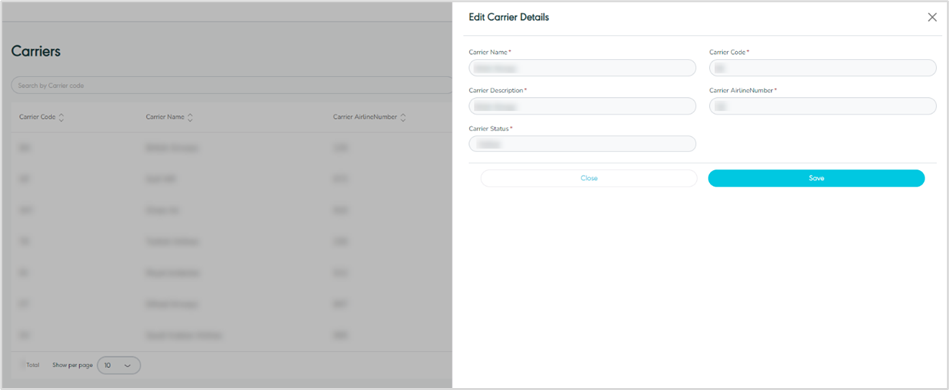
Figure 42- Edit Carrier
By clicking on Save, the system updates the Carrier successfully.
9.4 Delete Carrier
The user can delete a Carrier by navigating to the ‘Carrier’ screen via the Settings module and clicking on Delete from Actions.
10. Postal Code Management
The purpose of this feature is to define and manage the Postal Codes in the system along with their associated configurations.
10.1 View Posta Code
The user can view the defined Postal Codes in the system by navigating to the ‘Postal code’ screen via the Settings Module from the left navigation panel as follows:
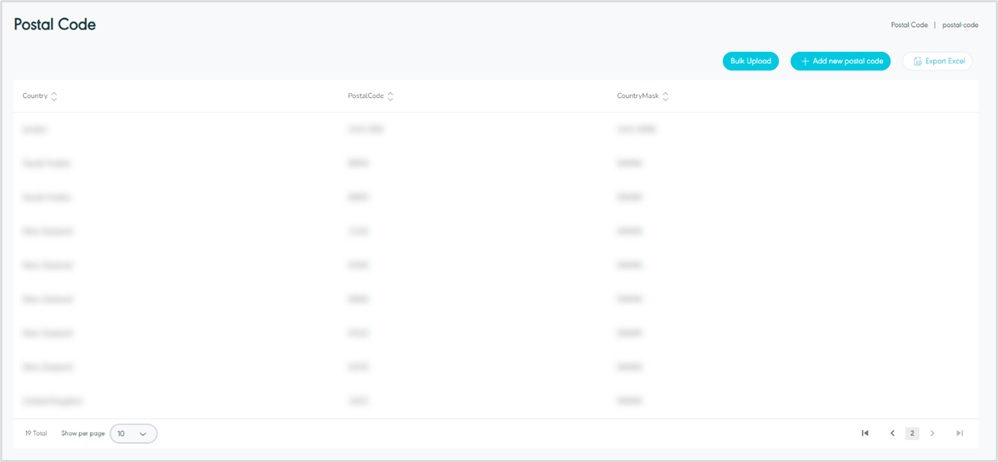
Figure 43- View Postal Codes
Show Per Page: the user can select the number of items to show on each page.
Add New Postal Code: the user can add a new postal code by clicking on Add New Postal Code, referring to the Add New Postal Code section.
Bulk Upload: the user can use this button to upload multiple postal codes, referring to Bulk Upload section.
Export Excel: the user can use this button to export all Postal codes in the system in excel format.
Actions: by clicking on action button the user can edit Postal Code details by referring to Edit Postal Code and delete postal code by referring to Delete Postal Code as follows:
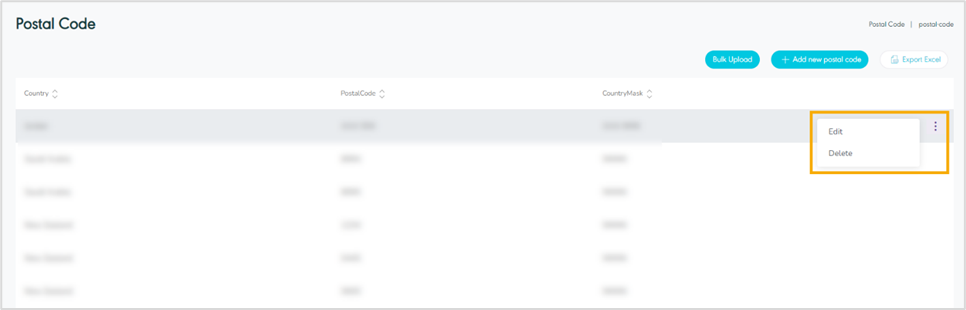
Figure 44 – Postal Code Related Actions
10.2 Add New Postal Code
The user can add a new Postal Code by navigating to the ‘Postal Code’ screen via the Settings Module and clicking on Add New Postal Code as follows:
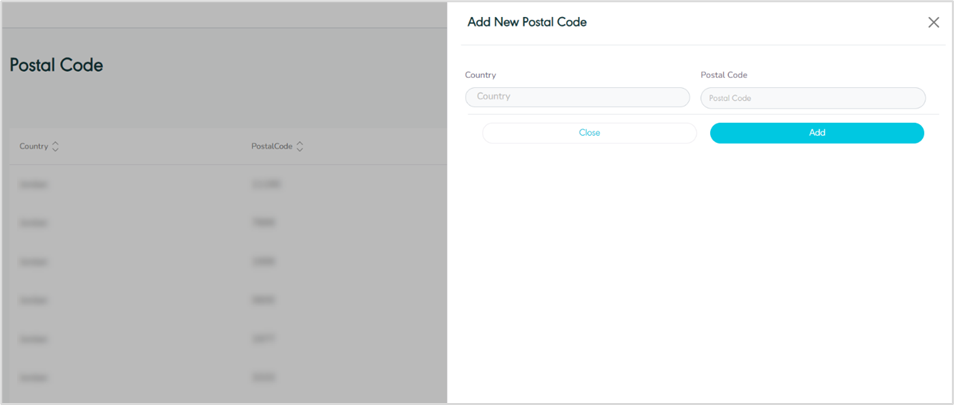
Figure 45 - Add New Postal Code
Country: this field represents the country’s name.
Postal code: this field represents the postal code.
By clicking on Add, the system adds a new postal code successfully.
10.3 Edit Postal Code
The user can edit Postal code information by navigating to the ‘Postal code’ screen via the Settings Module and clicking on Edit from Actions as follows:

Figure 46- Edit Postal Code
By clicking on Save, the system updates the Postal code successfully.
10.4 Delete Postal Code
The user can delete a Postal Code by navigating to the ‘Postal Code’ screen via the Settings Module and clicking on Delete from Actions.
10.5 Bulk Upload Postal Codes
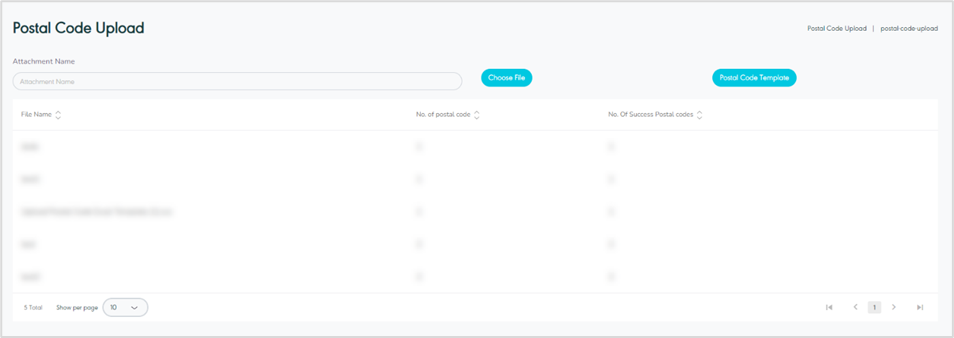
Figure 47 - Bulk Upload Postal Codes
Postal Code Template: by clicking on this button, the system downloads an excel template containing the required fields to fill in.
Choose File: the user can choose the template to upload once filled in.